 DIY
DIY
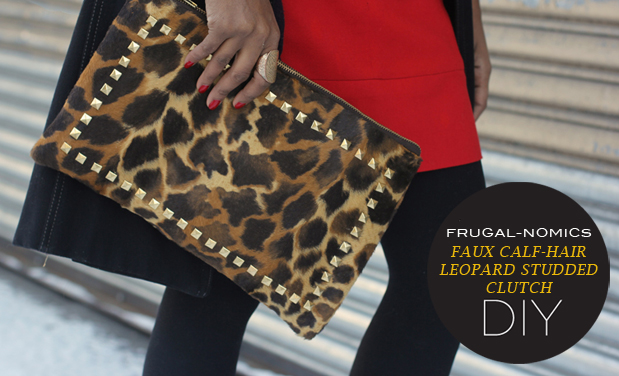
Frugal-nomics DIY: Faux Calf Hair Leopard Studded Clutch
One of my absolute favorite style bloggers is Wendy of Wendy’s Lookbook, and while perusing her site one day, I came across this gorgeous calf hair leopard-printed studded Valentino clutch that was simply stunning. So, I came across this great faux calf hair leopard-printed fur while I was grabbing the faux fur I used for my vest, and immediately knew what I’d do with it. Tell me what you think below.


SUPPLIES:
1/2 yard faux calf fur, 1/2 yard of silk lining, interfacing, a zipper, wire cutters, straight pins, about 70 pyramid studs, a rotary cutter, a straight edge, a thimble, and a sewing machine.

HOW-TO:
1. Cut (2) 14 x 9in rectangles of each of the faux fur and interfacing, and (2) of the silk lining 14.5 x 10in.
2. Use your wire cutters to remove all but 2 prongs (on opposite ends) from each of your pyramid studs (Note: it’s a little tedious, but glue wasn’t as secure as I would have liked, and if you leave on all the prongs, they rumple the fur).
3. While I did this step last, I’d like to suggest here that you apply your studs…because once you get it all sewn together it’s a little trickier to fold down the backs of the studs from the inside.
4. My zipper was a little too long, so I cut it down like I did here. Then I used my straight pins to secure it to one of my faux fur rectangles, face down.
5. I had to wrap my brain around how to attach lining and top fur….so I played with the concept on how to attach them both. So, while my faux fur was attached to one side of the zipper, I flipped the zipper over and pinned my hemmed silk lining to the “wrong” side of the zipper.
6. I laid it all flat here so you could see me attach the 2nd layer of fur to the “right” side of the zipper, with lining on the reverse.

HOW-TO CONT’D:
7. Sew your fur and lining respectively to your zipper.
8. This is how it looks thus far.
9. While sewing up the sides of my bag, I added the little 90 degree notch so zipper could be inset (like I did here with the throw pillows).
10. Last but not least, I pulled the lining out of the inner portion of the handbag, and stitched across the bottom (Note: you may have to pull it over the lining to sew the sides of it on the wrong side).

4 COMMENTS
very creative, i will try this with different leather and fabric. tanx for the tips
You are so very welcome Uju!
B! You’ve dont it again! This DIY is Great! You’re so talented!!
Thanks VintageNut….so glad you like