 DIY
DIY
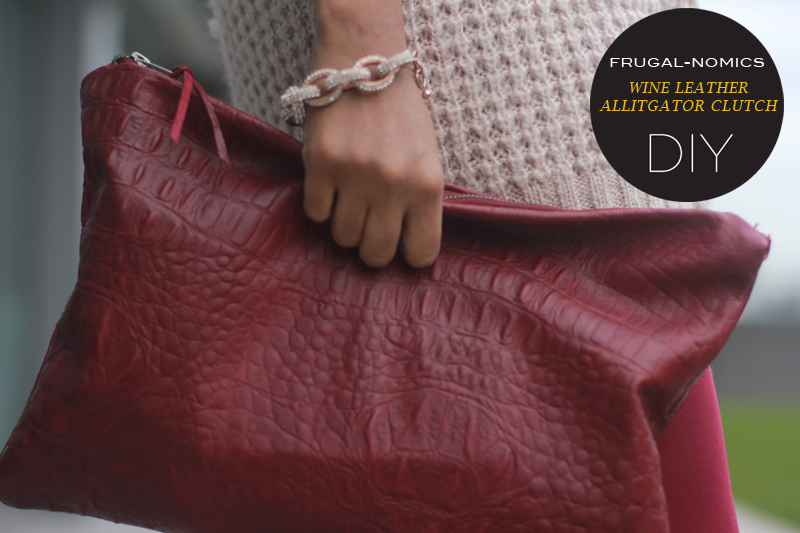
Frugal-nomics DIY: Wine Leather Alligator Clutch
I’ve found a new love — working with leather, and I’ve been cranking out a few projects since I received a lesson in leather making. My latest is this Wine Colored Leather Alligator Clutch. Since we’re in the chillier months, I’ve been really drawn to this color that looks great in just about anything — call it what you will — oxblood, wine, burgundy. Now, my first attempt at a clutch I had to wrap my brain around the whole flipping it inside out thing….but once you get it, you’ll be making one in every finish and color. I guarantee it. I’d love to hear your clutch success stories below.


SUPPLIES: a straight edge, silk polyester lining, some leather, straight pins, rotary cutter, scissors, a binder clip, and a zipper. 
HOW-TO:
1. So after you cut out 6 rectangles (2 tiny ones to encase the zipper, 2 leather 16 x 11 inches, and 2 lining 16 x 11 inches), take your 2 tiniest ones and attach them to either side of of zipper with binder clips.
2. Sew your tiny rectangles of leather to either side of the zipper.
3. Now this step can get a little tricky, but it’s super easy once you’ve done it the first time. Ultimately you want your leather on top of the zipper, and your lining on the under side. So take your leather and with zipper facing up, attach the right side of your leather to your zipper with your straight pins. (Note: you don’t want to get too close to your zipper teeth or you won’t be able to unzip it with ease). Repeat on opposite with lining.
4. Now go ahead and sew each.

HOW-TO CONT’D:
5. Here’s how it looks once leather is sewn to the zipper.
6. Now, you’ll have 4 flaps attached to the zipper: 2 leather, 2 lining. Line them up and hold the leather in place with binder clips before placing on sewing machine. Straight pins here might leave puncture marks in your leather. (Note: leave the zipper open about 5 inches, or it will be challenging to flip the bag to it’s right side).
7. After sewing up all 3 sides of your leather, you’ll sew up all 3 sides of your lining…but leave about 5 inches open on one side open.
8. Cut off the 2 corners on your leather. Now, you’re almost done — flip pull the leather through the lining and flip the bag a second time to get it all on right side with lining now on inside. Hand stitch up that 5 inch opening in the lining and you’re all set. 

7 COMMENTS
Amazing job!!! Where did you purchase your leather
Love this bag!
Can’t wait to recreate it with other fabric
BLEURGH – http://www.bleurghnow.com
would love to see it!
I’m jumping into sewing as well! This is very cute!
Thanks great Rae-Londa….please share some of your work! Would love to check it out!
Love this!!!! ~If only I knew how to use the sewing machine… 🙂
Xoxo
Lynn
http://www.faithnista.com
They have free classes at Mood Fabrics Lynn. I totally recommend snagging a second hand machine on craigslist and watching some youtube videos….and you’ll surprise yourself with what you can come up with!