 OUTFITS
 OUTFITS
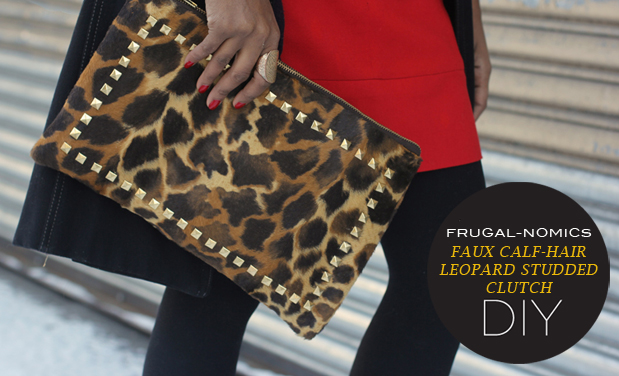 DIY
DIY
One of my absolute favorite style bloggers is Wendy of Wendy’s Lookbook, and while perusing her site one day, I came across this gorgeous calf hair leopard-printed studded Valentino clutch that was simply stunning. So, I came across this great faux calf hair leopard-printed fur while I was grabbing the faux fur I used for my vest, and immediately knew what I’d do with it. Tell me what you think below.
SUPPLIES:
1/2 yard faux calf fur, 1/2 yard of silk lining, interfacing, a zipper, wire cutters, straight pins, about 70 pyramid studs, a rotary cutter, a straight edge, a thimble, and a sewing machine.
HOW-TO:
1. Cut (2) 14 x 9in rectangles of each of the faux fur and interfacing, and (2) of the silk lining 14.5 x 10in.
2. Use your wire cutters to remove all but 2 prongs (on opposite ends) from each of your pyramid studs (Note: it’s a little tedious, but glue wasn’t as secure as I would have liked, and if you leave on all the prongs, they rumple the fur).
3. While I did this step last, I’d like to suggest here that you apply your studs…because once you get it all sewn together it’s a little trickier to fold down the backs of the studs from the inside.
4. My zipper was a little too long, so I cut it down like I did here. Then I used my straight pins to secure it to one of my faux fur rectangles, face down.
5. I had to wrap my brain around how to attach lining and top fur….so I played with the concept on how to attach them both. So, while my faux fur was attached to one side of the zipper, I flipped the zipper over and pinned my hemmed silk lining to the “wrong” side of the zipper.
6. I laid it all flat here so you could see me attach the 2nd layer of fur to the “right” side of the zipper, with lining on the reverse.
HOW-TO CONT’D:
7. Sew your fur and lining respectively to your zipper.
8. This is how it looks thus far.
9. While sewing up the sides of my bag, I added the little 90 degree notch so zipper could be inset (like I did here with the throw pillows).
10. Last but not least, I pulled the lining out of the inner portion of the handbag, and stitched across the bottom (Note: you may have to pull it over the lining to sew the sides of it on the wrong side).
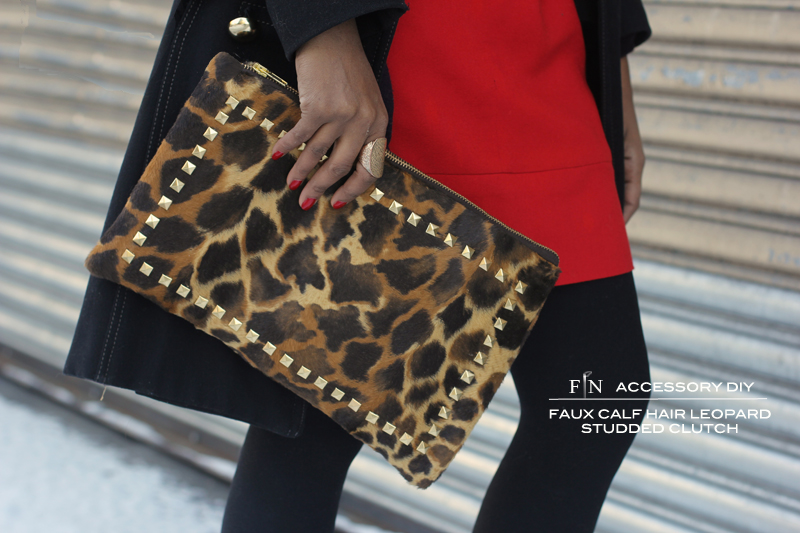
 DIY
DIY
Ok, so I’m going to let you in on a little secret — I’m a fairly newer sewer and my aspirations for a cape coat were a little ambitious. I mean in my mind this coat had great potential for being reversible — after all it worked for my tote bag)! Fabulous in and of themselves, my fabric choices didn’t quite work together — I found along the way that my plaid tweed added bulk to the lighter cashmere side of the cape. So, I had to do what any good DIY’er would do and salvage the project. I couldn’t let this beautiful cashmere go to waste? So, as you follow along you’ll see I begin my step-by-step process with the tweed side, and eventually separate the two pieces after Step #9, and finish up with just the cashmere. Presto, mission complete! Want to see how I end up, take a look below….you’re in for a colorful and fun ride!

SUPPLIES: a hook and eye, some straight pins, rotary cutter, scissors, tape measure, needle and thread, 2 yards of cashmere, a straight edge, pattern (I used this one from Matter of Style), and your sewing machine.
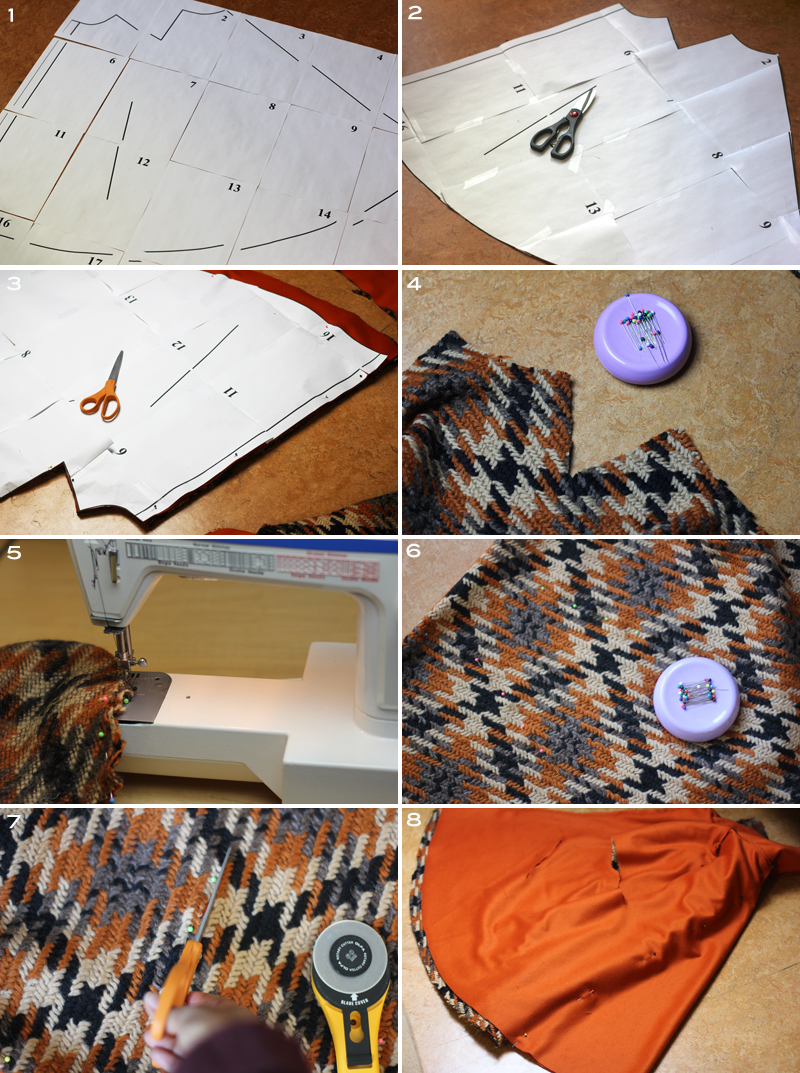
HOW-TO:
1. First thing you do is print out the pattern from here, and lay it out so you can see how it all fits together.
2. The printer margins make the pattern bigger than it has to be, so I folded back the unnecessary parts, taped it together in the desired form, and then cut it all out.
3. Now pin your pattern to your fabric and then cut it out….it will look like this once you are done (I added a couple extra inches to the bottom of mine for good measure).
4. Use your straight pins to pin your shoulder dart.
5. Create your shoulder dart with your sewing machine.
6. Not sure if you can see the pink and green respective row of pins that I used to mark the arm holes and the pockets, but go ahead and decide where you want those and pin it. (Note: In hindsight, in the future I’d probably follow the pattern and make vertical armholes and nix the pockets altogether).
7. Use your scissors and rotary cutter to make the incision and cuts for your pockets and armholes.
8. I wanted mine to fit a little closer to the body than the pattern allowed, so I made a dart down the back from the collar to the hem.
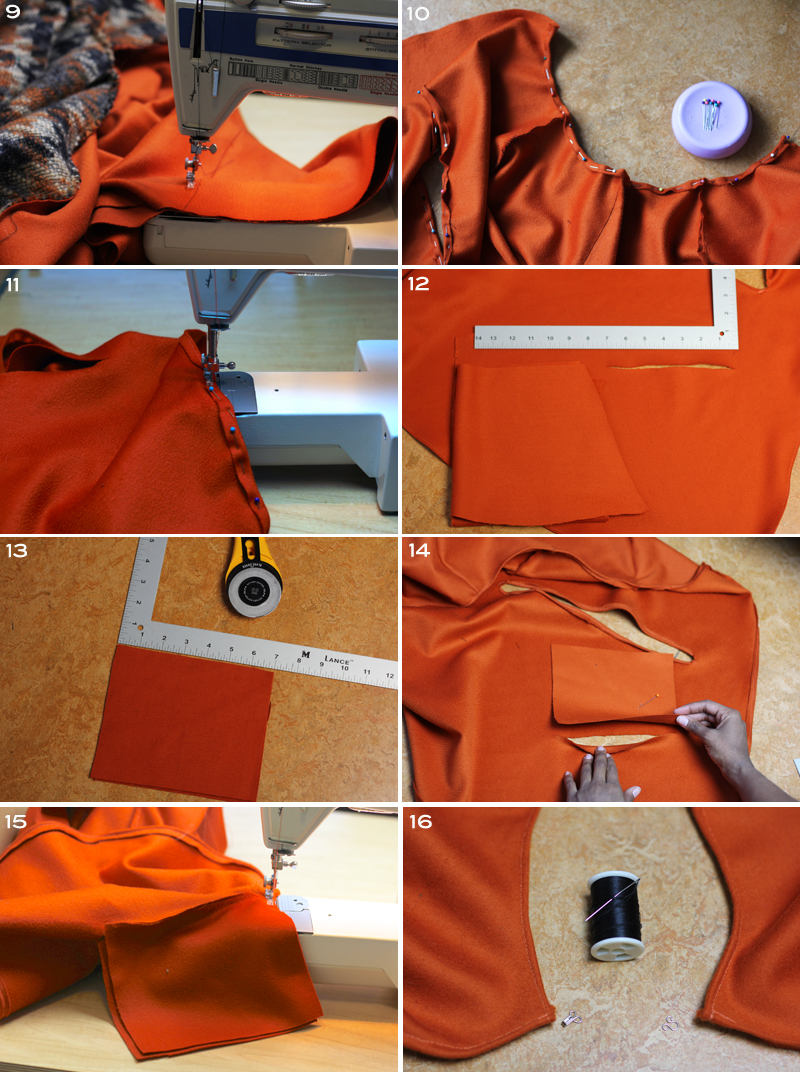
HOW-TO CONT’D:
9. Sew the two darts you created together and cut off the excess.
10. Use your straight pins to create a finished hem around the neckline, pockets, armholes, bottom, and edges along both sides of the front of the coat.
11. Using a 1/4 inch seam allowance, go ahead and hem everything up with your sewing machine.
12. Now it’s time for the pockets…..measure out a square for the length and depth you want your pockets to be that will line up with the incisions that you made for it.
13. Once you decide how wide you want your pockets, double up your fabric and cut out four squares this size.
14. Now it’s time to pin your pockets into place, so first hold down the bottom flap of your pocket, and take your first pocket square and place it right side facing down. Now pin it in place to this bottom flap, and repeat on the opposite side with the top flap (Note: You want the finished fabric to be visible if you were to look inside your pocket).
15. Sew your pockets on, and finish off the edges with your machine.
16. Last step, hand stitch your hook and eye to the upper corners of your two front panels, as a closure. You’re all done!
