Category: DIY

DIY

Frugal-nomics DIY: Fabric Covered Lampshade

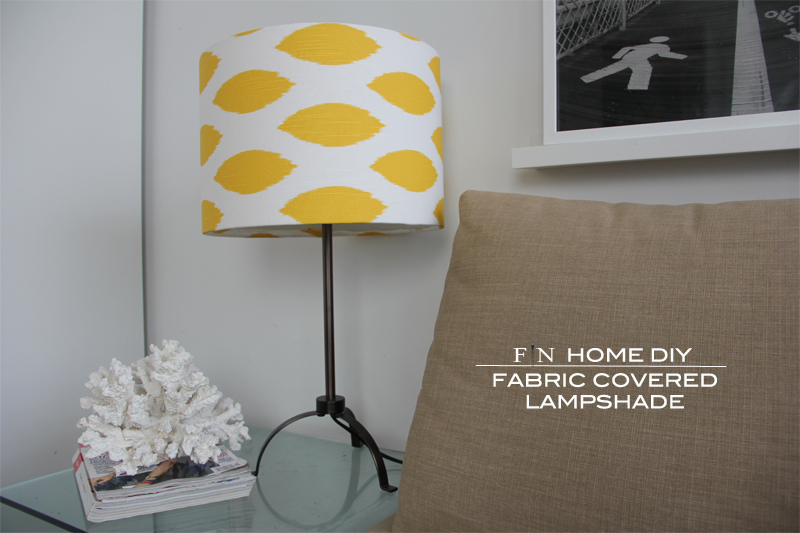
I’m finding that creating your own personalized home decor has never been easier.  So I decided to finally do something with the blank lampshade I’ve been staring at for a couple years now.  I knew I wanted something with a splash of yellow that would compliment the throw pillows I had made a while back.  So, with less than an hour of time and a yard of fabric, I created a splashy solution that completely brightens up my space.  Tell me what you think?


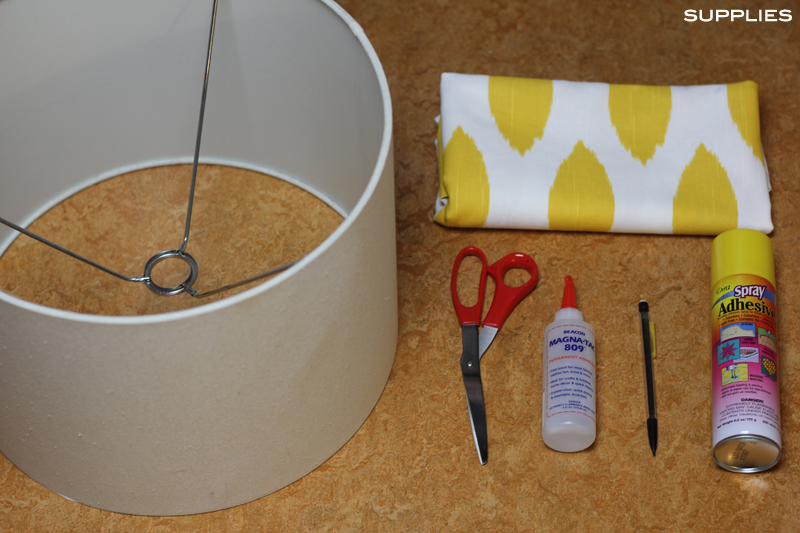
SUPPLIES:  lampshade, a yard of light- to medium-weight fabric, scissors, fabric glue, pencil, and spray adhesive.
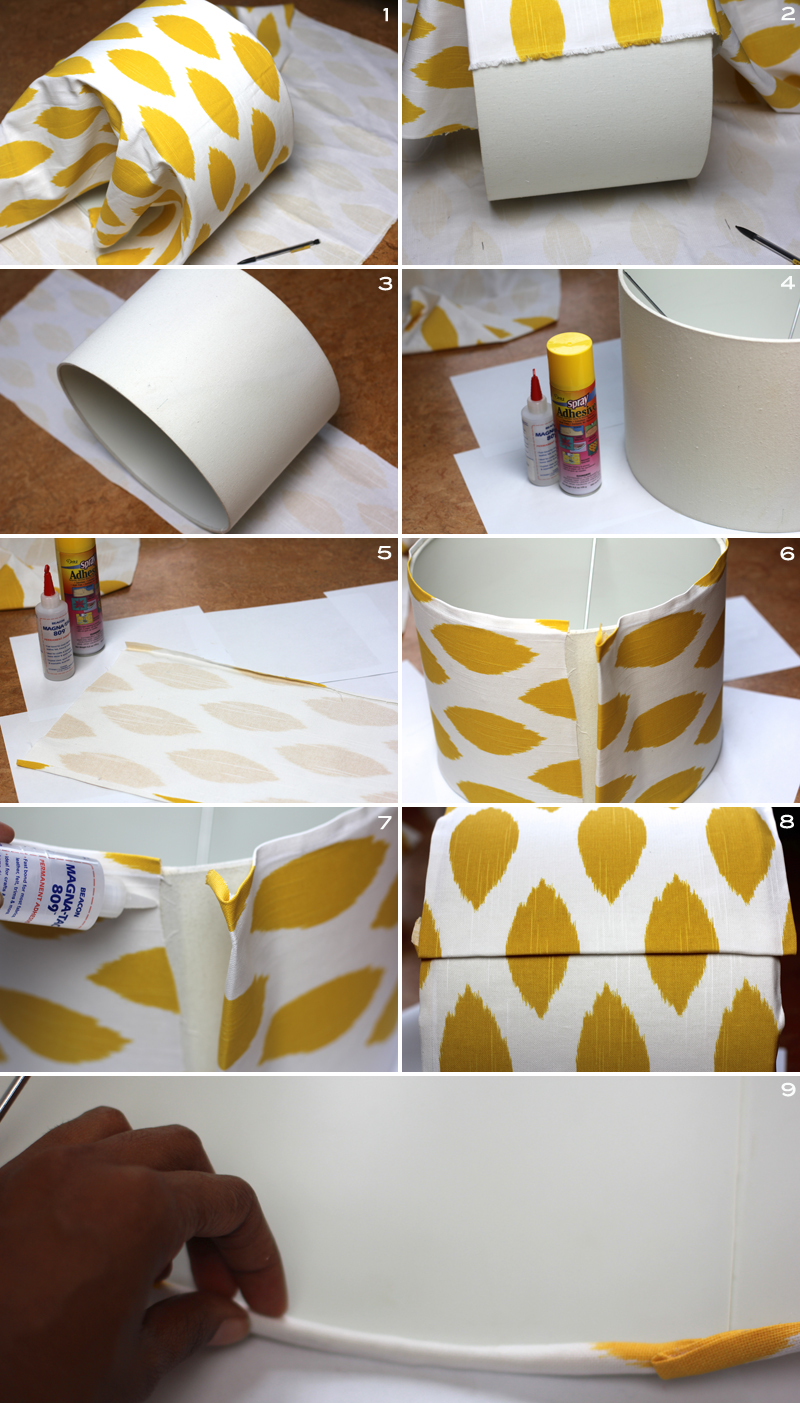
1. Wrap your lampshade in your fabric, then take your pencil and mark 1.5 inches past the point where the fabric meets the other side.
2. Being conscious of where you want your pattern to lay on the shade, mark 1 inch with your pencil at what will be the top and bottom of the lampshade drum.
3. Cut out your form — it will look like this.
4. Lay out some newspaper, and spray your lampshade with the adhesive (Note: It’s best to do this outdoors; but if you must do it indoors, be sure to be in a well ventilated area).
5. In addition to the shade, spray your fabric with the adhesive, along with dotting it with the fabric glue for added security (Note: I added the fabric glue because I realized my spray adhesive was only temporary).
6. Carefully wrap your lampshade in the fabric — I started in on the seam, so I could end there as well (Note: It was immediately fast drying, so I had a few seconds to play around with it to get it right).
7. Glue along this seam that you started and stopped on, then fold back the flap so you have a neat edge — now press it into place.
8. I wanted my print to line up as best it could….here it how it looked along the seam.
9. Lastly, glue along the top and bottom edge of the drum, and then fold the fabric down, like a hem (Note: If you want it to look really neat, fold it down twice — feel free to use the iron if you need to). Voila!
DIY

Frugal-nomics DIY: Stella & Dot Tempest Inspired Necklace

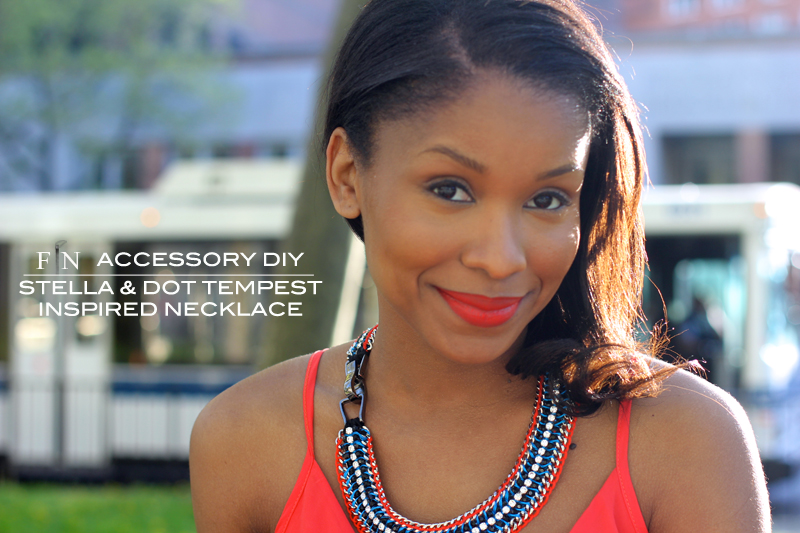
I’ve had a long time love affair with some of the creations from the jewelry line of Stella & Dot. But, sometimes our taste exceeds our budget.  Knowing a good statement necklace is often a staple in your wardrobe, I’ve opted to do it myself.  So, I grabbed some chain and embroidery floss and took to making my own version of Stella & Dot’s Tempest Necklace.  Like the Tempest, my necklace can be worn two ways — double the bang for your buck. Tell me what piece you’d like to see me recreate next, below. Have a great day!


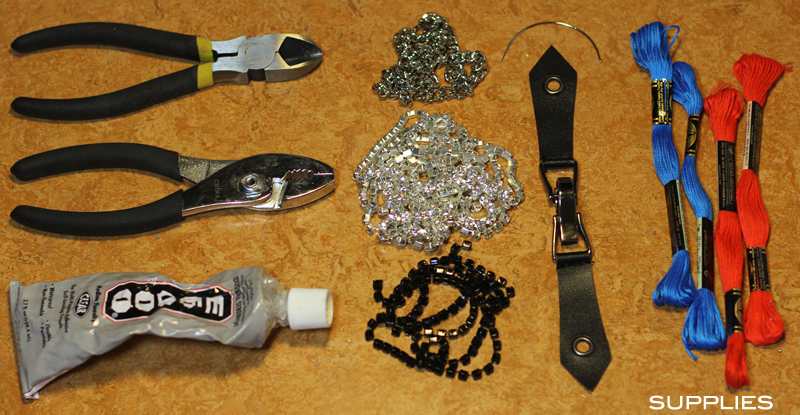
SUPPLIES: a pair of wire cutters, pliers, glue, chain, crystals (in black and clear), upholstery needle, closure, and embroidery floss.

HOW-TO:
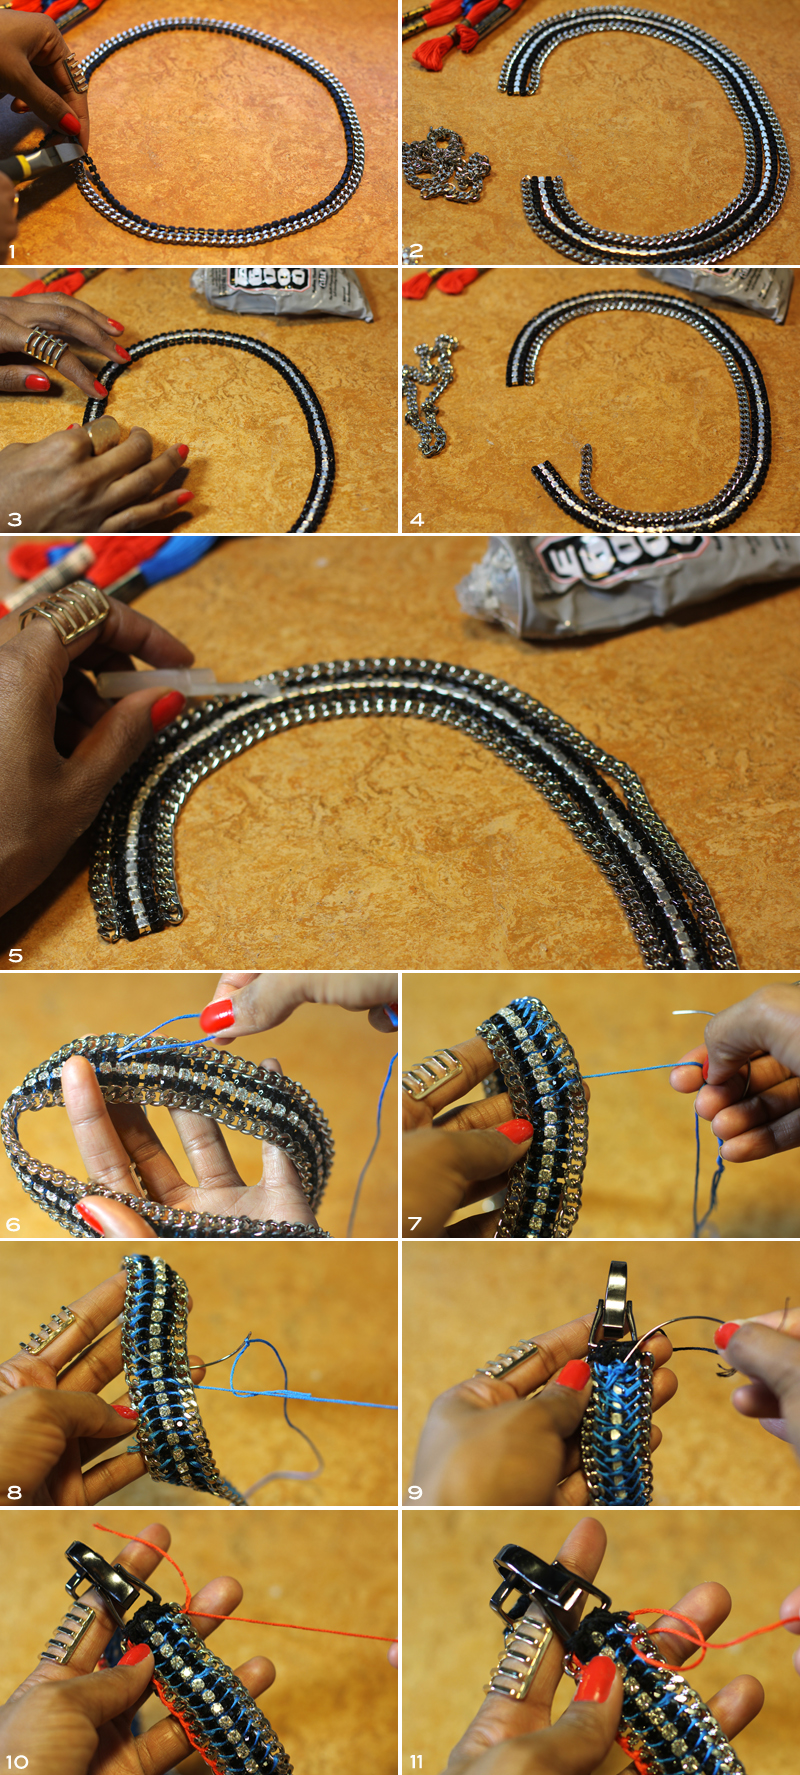
1. Using your wire cutters, cut down 3 pieces of crystals (I used to 2 black and one clear), along with 2 pieces of chain (Note: due to the nature of them curving, one will be gradually longer than the other from the inner edge to the outer edge).
2. You want to play around with the chain and crystals visually to figure out what you want.  Once you decide, lay everything out FACE DOWN in that formation exactly (Note: This step is extremely important, because once it is set, it’s set).
3. Now that you have an idea of what it’s going to look like, remove the 2 pieces of chain from the outer and inner perimeter, and begin to apply glue to the back side of just the crystals you will be working with (Note: you want glue not only on the back, but in between each chain a bit. You don’t want it to be too messy and show through the front of the necklace, but at the same time you do want them to adhere to each other). Let this sit for about an hour to dry.
4. Add back in the inner chain, and begin to add glue along the side of the chain and crystals.
5. Do the same thing for the outer chain, that you did for the inner. (Note: I used a pen cap to make the glue application in between chain and crystals, easier).
6. With my needle and thread, start binding just the 3 rows of crystals together.  You will ultimately tie the whole thing together, but start here.  I began on the back side and brought my needle up over top of the first row, drove needle beneath the middle row, and then went over the top of the last row — ending on the back side of the necklace.  From there, I fed my thread diagonally over to the top of the next row, and began again.
7. Next step is to bind the inner chain to the row of 3 crystals you tied altogether already. Knot the thread to the first link on the chain like I did in Step #10 — as always, starting on the back side.  Then drive needle from bottom over the top of the first row of black crystals, through the eye of the next adjoining chain link, back through the bottom. Repeat.
8. Repeat Step #7 for outer chain.
9. Grab one side of your clasp, you decide what will be top and which will be bottom.  I used black thread for a sleeker look. Starting with chain on one end, weave needle through each opening of crystals and chain, making sure to drive the needle over the bar of the clasp, with each pass. Then tie it on the back. (Note: the picture is a visual of how the under side of the necklace looks at this point).
10. With needle attached to thread, knot one end of a very long orange string (I’d say at least 3 feet) to the first link in the chain.
11.  Chain and crystals are all bound together at this point, so this threading is purely for decoration.  Take this same string and drive needle over the adjoining link to the right, and directly through its middle.  Right before you pull the thread taught, bring the needle back up directly between the necklace and the anchor thread (NOT BEHIND this thread –See picture).

DIY

My Feature on Alleywire


Happy Friday guys…..man, these weeks fly by faster and faster 🙂 Ok, so you all know I have been feverishly creating more DIY’s this summer…what you may not know is, I was recently honored to have Alleywire — a company who spotlights startups and innovators — reach out to me for an interview.  I was so very excited to be able to showcase my work to a new audience, and am SO very pleased with the outcome — I couldn’t wait to share it with you all (that’s if you haven’t already seen me shouting it from the rooftops on Twitter 🙂  But feel free to watch it, share it, and hop over to their site to comment to show them you’re a fan.  I appreciate everything you all do to support my endeavors — it really helps keep me going. Have a wonderful weekend. xoxo, Brandhyze