Tag: DIY

DIY

Frugal-nomics DIY: Faux Fur Vest

If you ask me, buying the perfect faux fur vest can be a little tricky…I mean, there are so many factors to consider.  I know this because after a month of looking, I finally settled on a Zara one on eBay that would do, but it wasn’t my dream vest. I mean, when shopping; not only do you have to make sure it’s the right length, but you also have to ensure that the hair doesn’t look too fake AND that it’s in your price range—which can be sometimes be a bit of a tall order for one vest. But, it doesn’t have to be….not if you make it yourself, and that’s just what I decided to do.


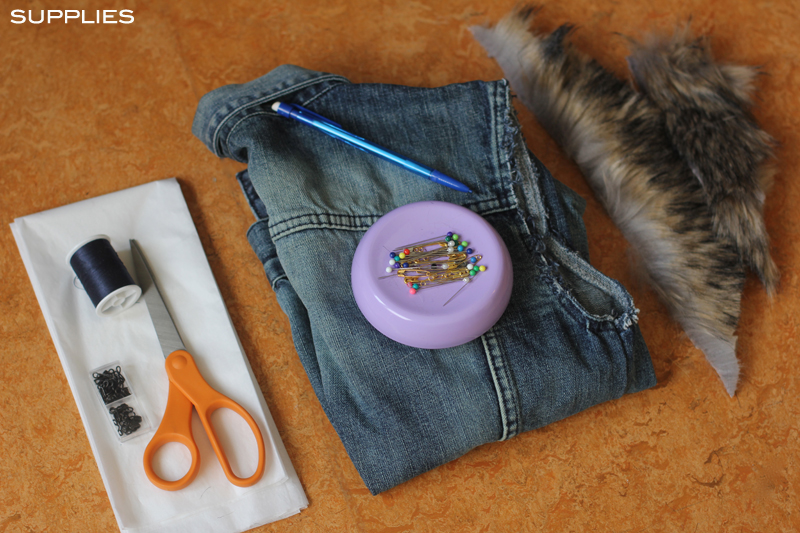
SUPPLIES: Needle and thread, hook and eyes, scissors, tissue paper (or tracing paper), some straight pins, a sample vest of any kind, silk lining (pictured below), a yard of faux fur, and a sewing machine.
HOW-TO: 
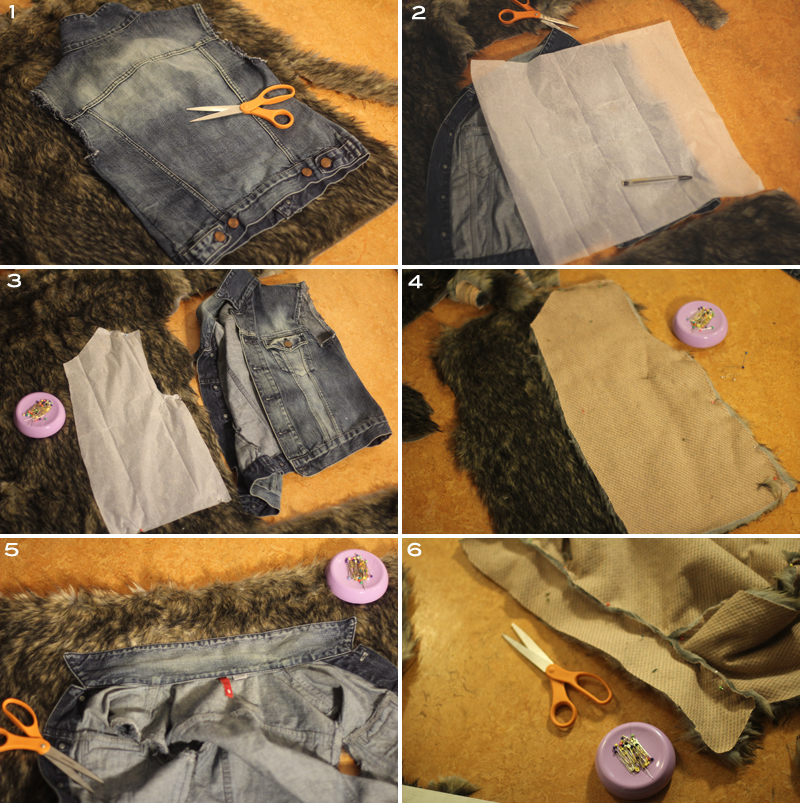
1. First you need to create a pattern…remember that vest you grabbed out of your closet?  I started making the pattern with the back panel first.  I used a thrifted denim jacket that I cut the sleeves off of — and cut it out (Note: I gave it about a 1.5 inch seam allowance on 3 of the sides, but about 2.5 inches at the bottom).
2. Here I used my tissue paper to trace one of the front panels to create a pattern for it.
3. Cut out the form you created and go ahead and pin it to your fur.
4. Next, cut out all 3 pieces and pin each side panel to your back panel (right sides facing each other).
5. I wanted a collar on my vest and used the collar on my denim vest again as a guide (Note: I made my faux fur vest collar about 4 inches longer and made the ends squared off then pointed).
6. After you’ve cut out your collar, pin in to the top of your back panel. Looking good so far.
HOW-TO CONT’D:
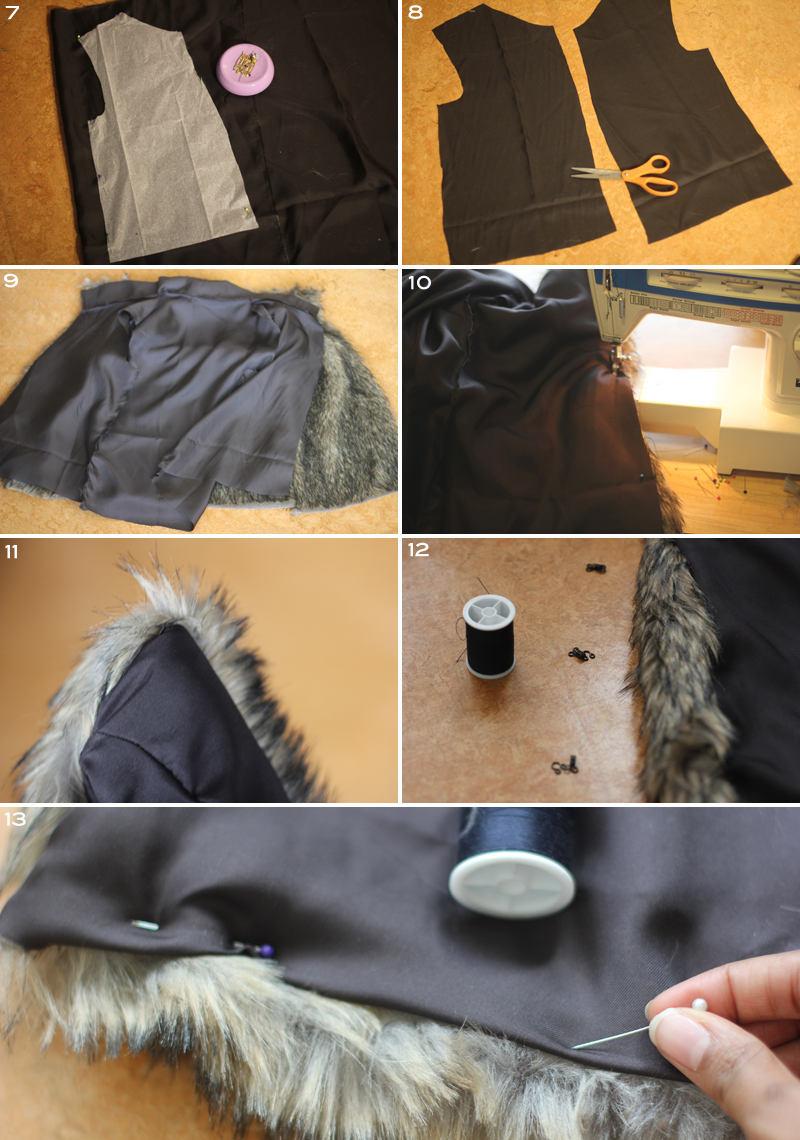
7. The under side of the faux fur was unfinished, kinda like carpeting.  So I opted to add a lining to mine. Therefore I used the patterns I created for the fur vest, to create another one with the lining.
8. Here I’ve started to cut out the front panels. Sew them all together the same way.
9. Now take your finished lining and fur vest and place them together (right sides facing each other), and use your straight pins to pin them together with a 1/4 inch seam allowance across the collar and down both sides of the front (Note: Leave the bottom hem open as well as the arm holes for now).
10. Now sew the two sides and collar that you just pinned.
11. You’re getting close, now flip the vest on the right side.
12. Take three hook and eyes and hand stitch them to the front of your vest.
13. Lastly pin the bottom hem as well as the arm holes, before you hand stitch them together, and you are all done!

DIY

Frugal-nomics DIY: Stella and Dot Inspired Pegasus Necklace

I’ve gotta admit that I’ve had a jewelry crush on the Stella and Dot Pegasus Necklace for a couple years now, and while I believe in investing in a few really nice statement necklaces, I couldn’t bring myself to cough up the over $200 price tag they were asking. So, me not minding to put the work in when it’s something I want, I took to finding suitable leaves to begin my jewelry quest to create a Stella and Dot Pegasus Knockoff. I was so very excited to complete it, and I’m happy to say that I get soooo many compliments on this when I wear it — and I do wear it quite often.  Gotta a necklace you’re crushing on? Tell me below. Of if you’ve been inspired by this one….please leave a comment too.


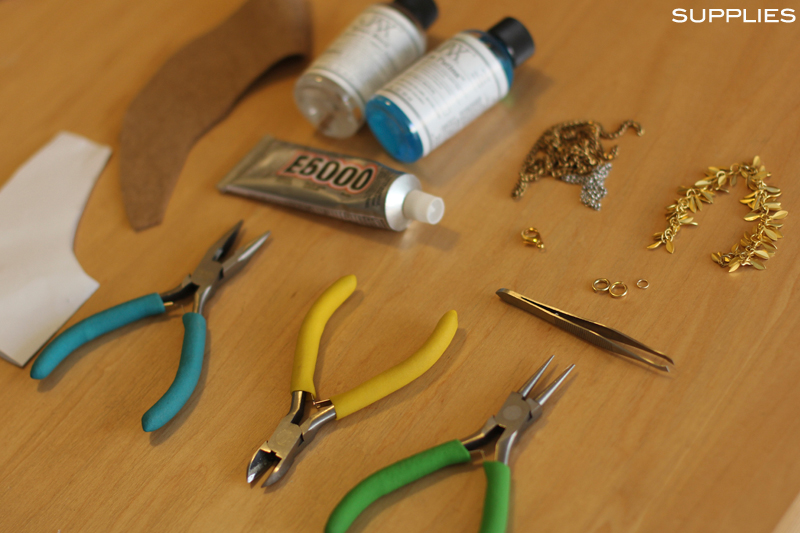
SUPPLIES: felt, patina, glue, assorted chain (I used 2 kinds), bulk folded leaf chain (I used about 6 feet — about 120 leaves come on each foot), 3 findings, a lobster clasp, tweezers, scissors, pliers, wire cutters, straight pins, a bowl, and paper to create the pattern for the shape of the necklace you desire.


HOW-TO:
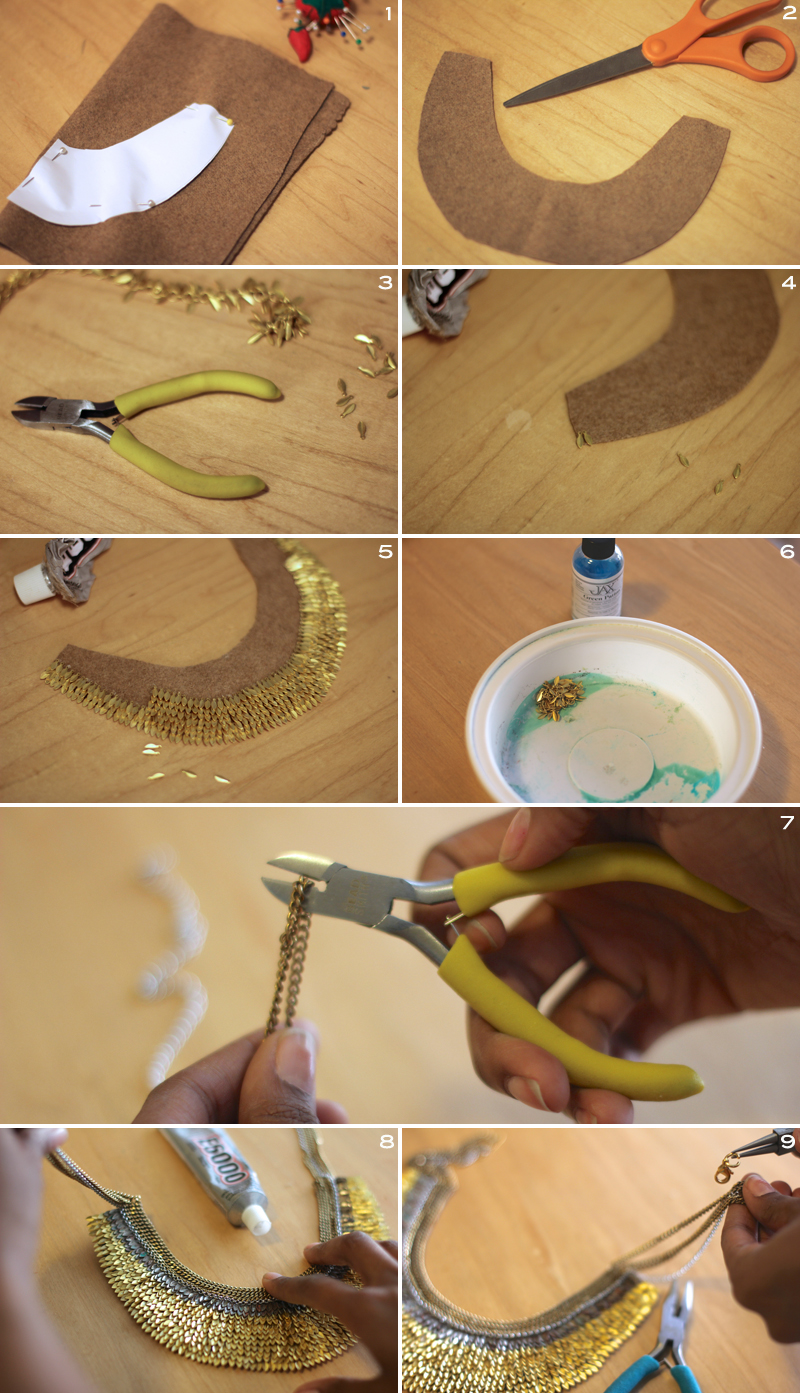
1.  Take a piece of paper and fold it in half, then cut out the shape of your desired necklace. After that…use your straight pins to attach your paper pattern to your folded in half felt.
2. Cut out this form.
3. The leaves will come on a chain, so take your wire cutters and remove them all from the chain.
4. Once all the leaves were removed from the chain, here I used my tweezers to lightly dip each leaf in the glue and then carefully adhere it to the wrong side of the felt.
5. I made long rows from left to right, being careful to visualize where my rows of leaves with patina and chain would begin.
6. Next I immersed about 155 leaves in a small bowl with green patina, and let it sit for a few hours. Once they reach my desired color of green, I rinsed them off, and then patted them dry before glued them to the felt.
7. Figure out how low you want your necklace to hang — mine is moderately close to my neck, then cut the 2 types of chain to your desired length.
8. Add a little glue to the exposed surface of felt, and press your chain into place.
9. Add a jump ring and clasp to one dangling side of your chain, and then pinch it closed. Repeat on opposite side with just a jump ring.


DIY

Frugal-nomics DIY: Sequin Bow Headband

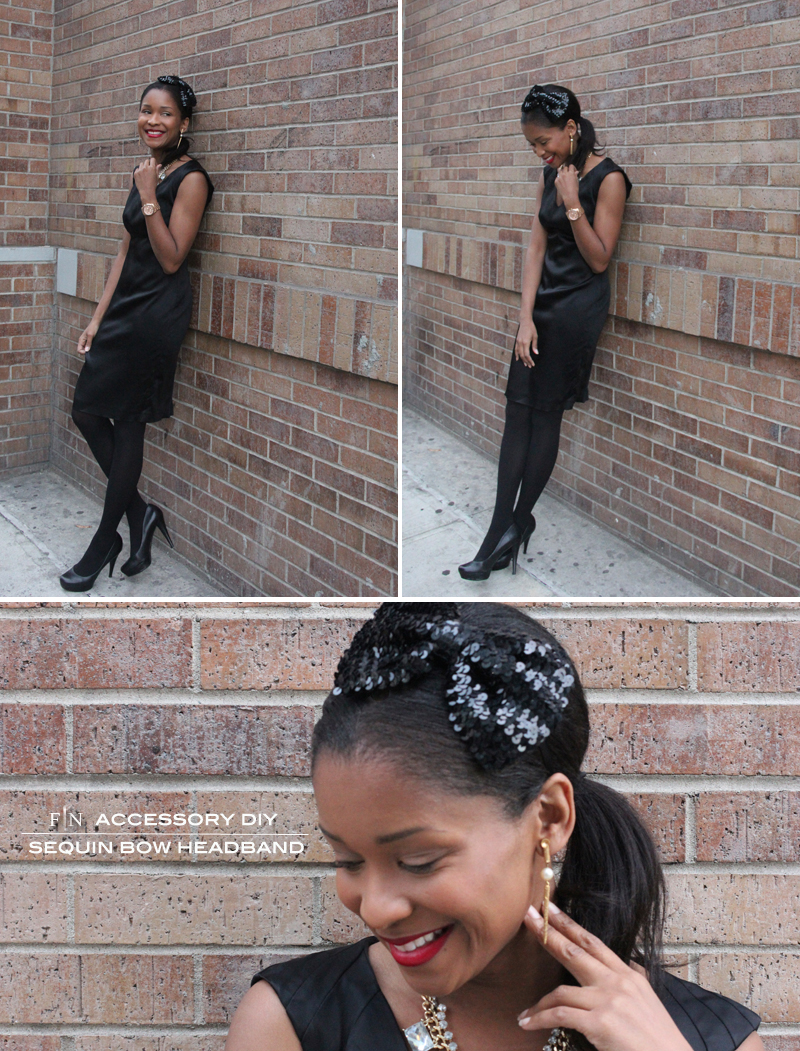
Shine, shimmer, sparkle….I’m all in (!) — and with the holidays just around the corner, you may want to incorporate all three into your winter ensemble.  Now, me personally, I don’t own a great deal of decorative hair accessories. But when I saw this sequin bow I knew I had to start a new trend for myself. So with a little glue, this fabulous sequin bow, and a spare headband, I am holiday ready – super quick, super fun, super chic…all in a flash!

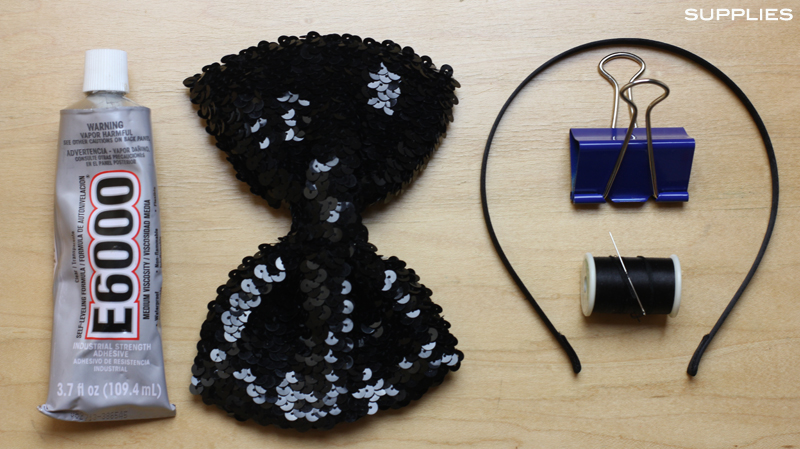
SUPPLIES: glue, sequin bow, headband, binder clip, and needle and thread.

HOW-TO: 
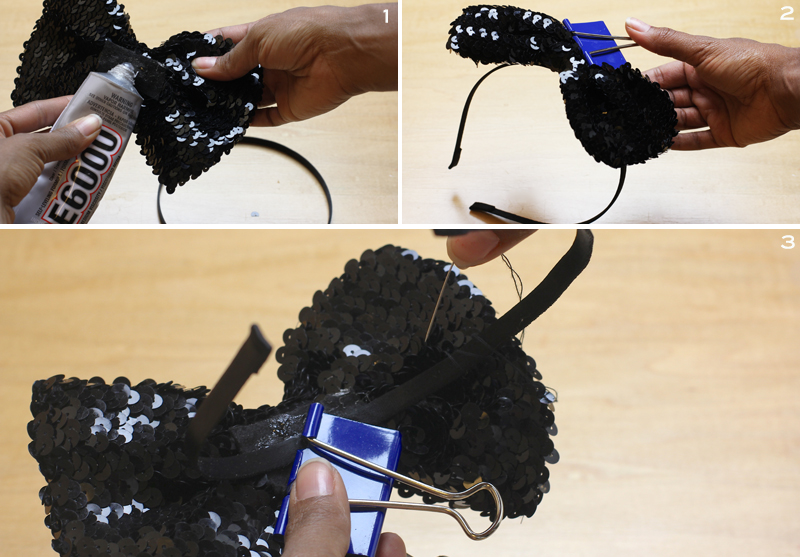
1. Add some glue to the back of your bow.
2. Adhere bow to your headband in the position you want it, and clamp it with the binder clip to let it dry for about an hour (Note: Add a piece of ribbon on the backside if you are concerned about any exposed glue touching your hair even after it drys).
3. Rather than let them stick up, I used a needle and thread to stitch the two flaps to the headband itself. Voila