Category: DIY

DIY

Frugal-nomics.com DIY: Sweater Mittens

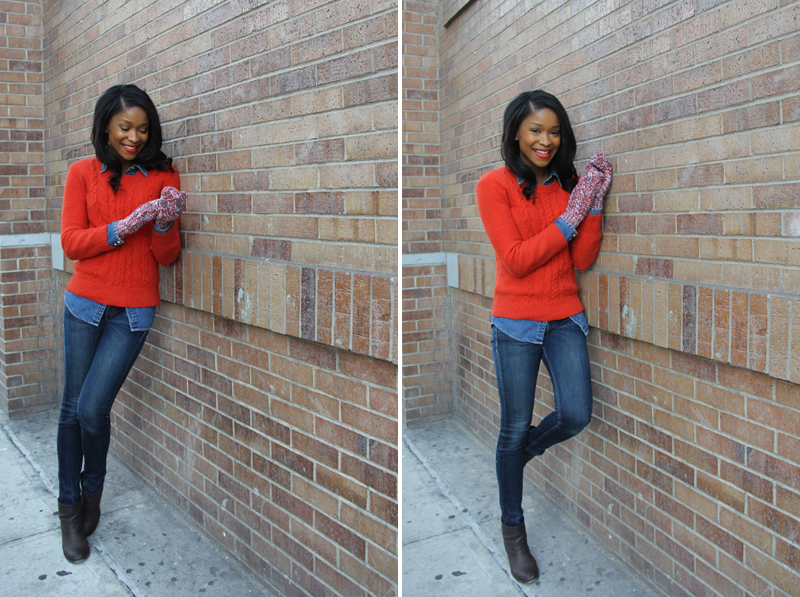
When will the snow end? I’m sure I’m not the only one who is absolutely over it at this point. But, I am a firm believer that the added bulk in layers doesn’t mean we have to compromise our fashion sense. Want a cute way to stay warm that doubles as a quick way to repurpose those old sweaters? Check out my How-To below.
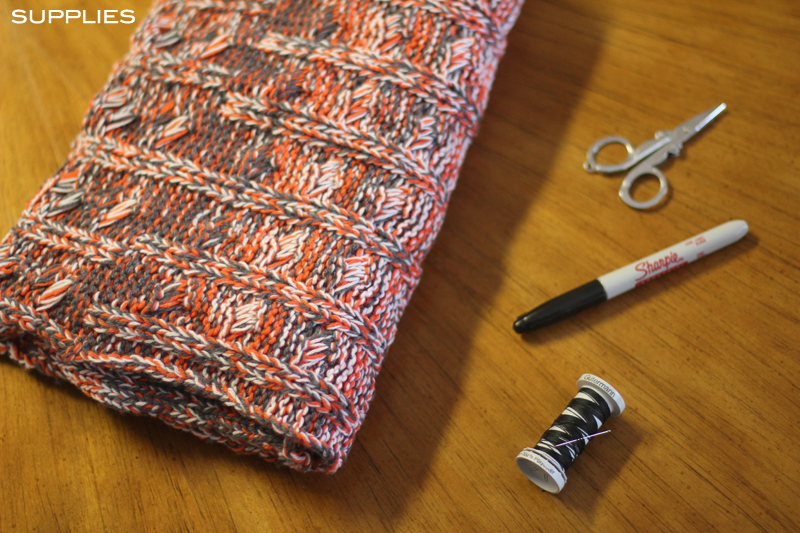


SUPPLIES: An old sweater or some sweater knit material, scissors, marker, and ideally a sewing machine if you don’t want to hand stitch like I did. 

HOW-TO: 
1. Take your retired sweater or rectangle of sweater material with the finished ribbed edge at the bottom, and lay it flat on the table in front of you, right side facing up. Next, take the two outer edges and fold them inward until they meet at the center (Note: the wrong side will be facing you).
2. Place one of your hands down on the fabric with your thumb open an extended, and loosely trace your hand (Note: you’ll want about half an inch room around your hand).
3. Here I hand stitched around the black outline of the hand I created. But, for added security for gloves that will last, I suggest quickly running them on your sewing machine.
4. Last but not least….leave about 1/4 inch room around the perimeter of your hand, cut out this figure, and then turn your gloves right side out. You’re all set!
DIY

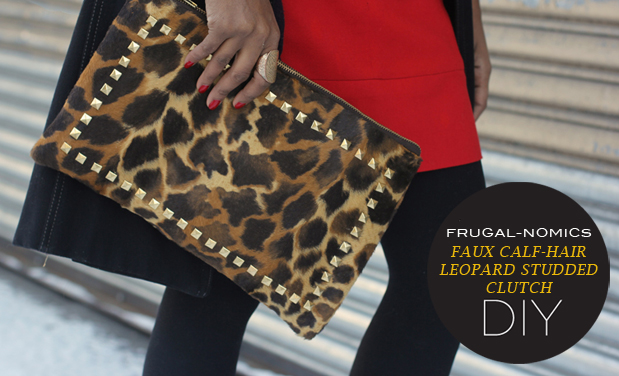
Frugal-nomics DIY: Faux Calf Hair Leopard Studded Clutch

One of my absolute favorite style bloggers is Wendy of Wendy’s Lookbook, and while perusing her site one day, I came across this gorgeous calf hair leopard-printed studded Valentino clutch that was simply stunning. So, I came across this great faux calf hair leopard-printed fur while I was grabbing the faux fur I used for my vest, and immediately knew what I’d do with it. Tell me what you think below.


SUPPLIES:
1/2 yard faux calf fur, 1/2 yard of silk lining, interfacing, a zipper, wire cutters, straight pins, about 70 pyramid studs, a rotary cutter, a straight edge, a thimble, and a sewing machine.

HOW-TO:
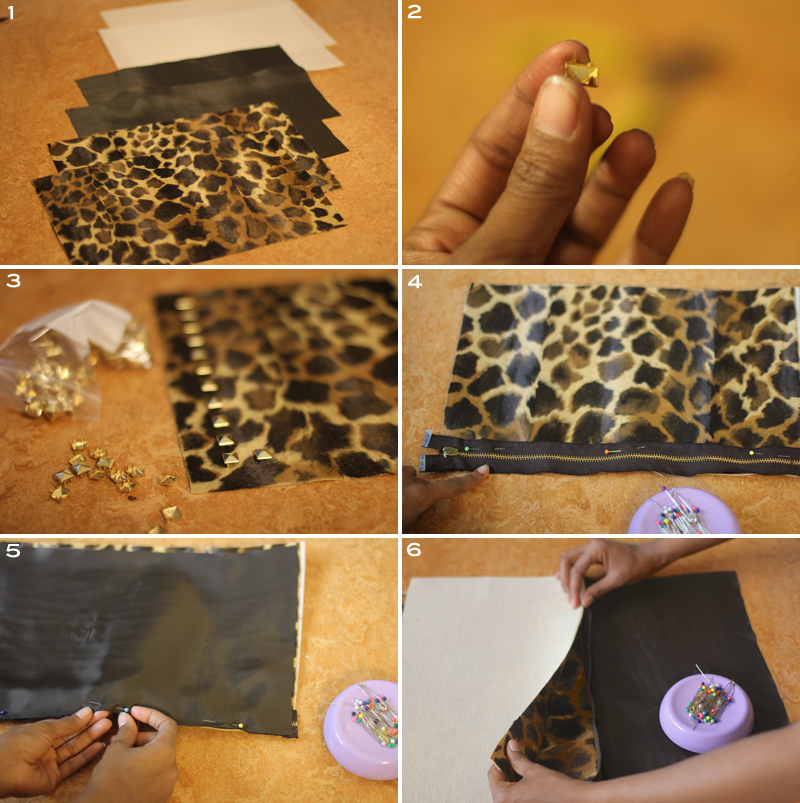
1. Cut (2) 14 x 9in rectangles of each of the faux fur and interfacing, and (2) of the silk lining 14.5 x 10in.
2. Use your wire cutters to remove all but 2 prongs (on opposite ends) from each of your pyramid studs (Note: it’s a little tedious, but glue wasn’t as secure as I would have liked, and if you leave on all the prongs, they rumple the fur).
3. While I did this step last, I’d like to suggest here that you apply your studs…because once you get it all sewn together it’s a little trickier to fold down the backs of the studs from the inside.
4. My zipper was a little too long, so I cut it down like I did here. Then I used my straight pins to secure it to one of my faux fur rectangles, face down.
5. I had to wrap my brain around how to attach lining and top fur….so I played with the concept on how to attach them both. So, while my faux fur was attached to one side of the zipper, I flipped the zipper over and pinned my hemmed silk lining to the “wrong” side of the zipper.
6. I laid it all flat here so you could see me attach the 2nd layer of fur to the “right” side of the zipper, with lining on the reverse.

HOW-TO CONT’D:
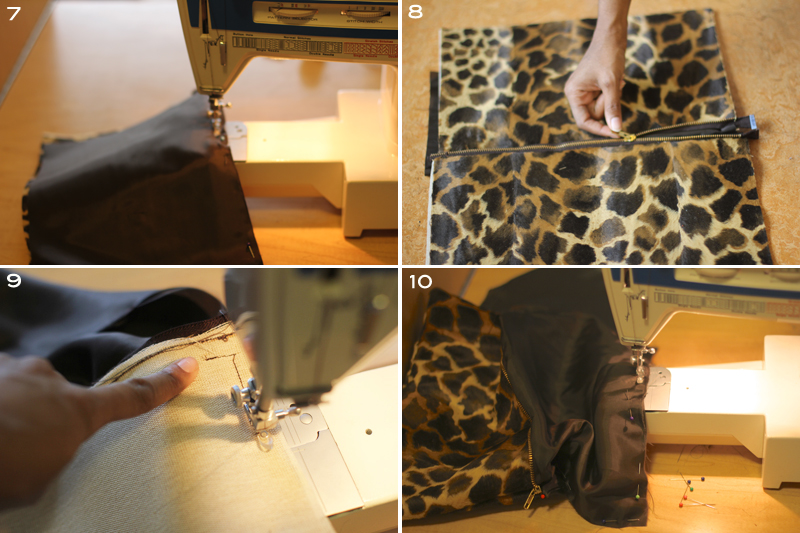
7. Sew your fur and lining respectively to your zipper.
8. This is how it looks thus far.
9. While sewing up the sides of my bag, I added the little 90 degree notch so zipper could be inset (like I did here with the throw pillows).
10. Last but not least, I pulled the lining out of the inner portion of the handbag, and stitched across the bottom (Note: you may have to pull it over the lining to sew the sides of it on the wrong side).

DIY

Frugal-nomics DIY: Faux Fur Vest

If you ask me, buying the perfect faux fur vest can be a little tricky…I mean, there are so many factors to consider.  I know this because after a month of looking, I finally settled on a Zara one on eBay that would do, but it wasn’t my dream vest. I mean, when shopping; not only do you have to make sure it’s the right length, but you also have to ensure that the hair doesn’t look too fake AND that it’s in your price range—which can be sometimes be a bit of a tall order for one vest. But, it doesn’t have to be….not if you make it yourself, and that’s just what I decided to do.


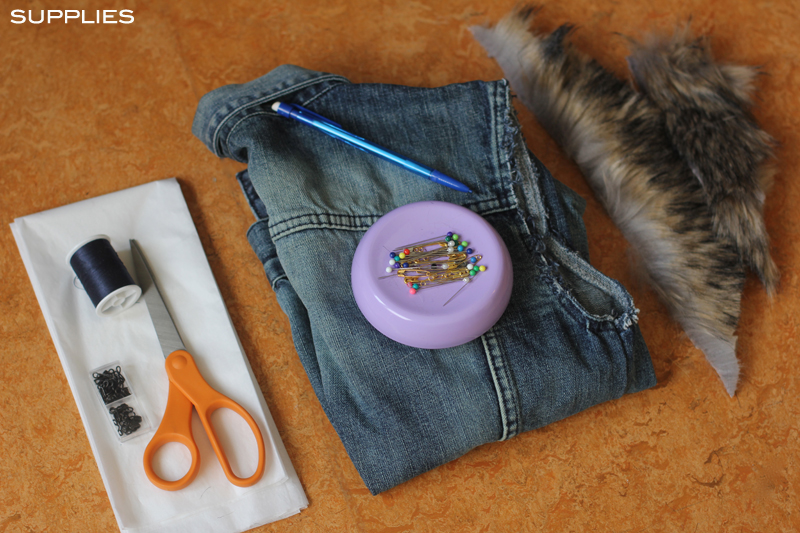
SUPPLIES: Needle and thread, hook and eyes, scissors, tissue paper (or tracing paper), some straight pins, a sample vest of any kind, silk lining (pictured below), a yard of faux fur, and a sewing machine.

HOW-TO: 
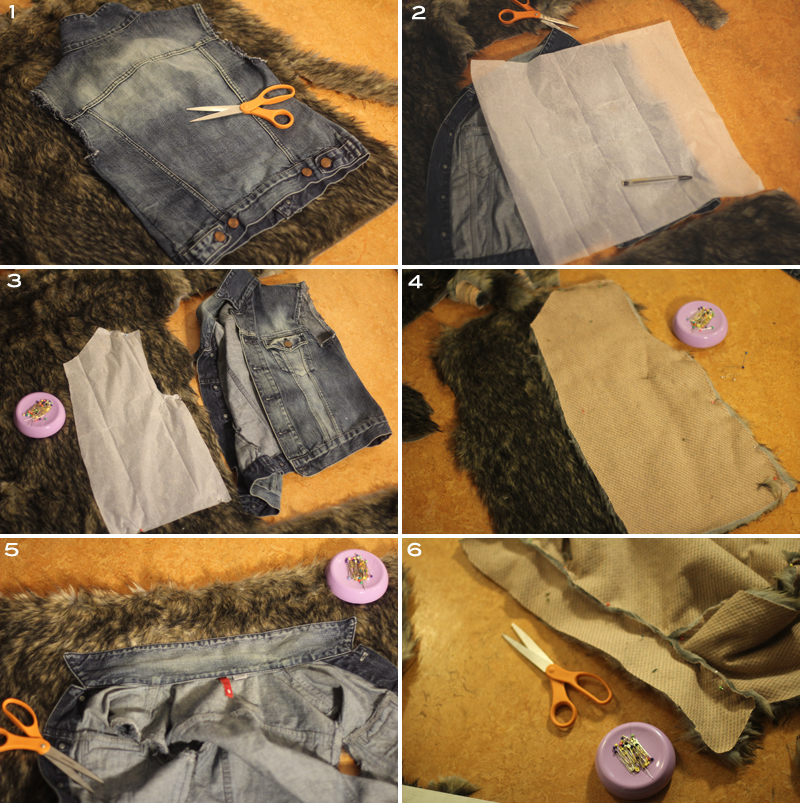
1. First you need to create a pattern…remember that vest you grabbed out of your closet?  I started making the pattern with the back panel first.  I used a thrifted denim jacket that I cut the sleeves off of — and cut it out (Note: I gave it about a 1.5 inch seam allowance on 3 of the sides, but about 2.5 inches at the bottom).
2. Here I used my tissue paper to trace one of the front panels to create a pattern for it.
3. Cut out the form you created and go ahead and pin it to your fur.
4. Next, cut out all 3 pieces and pin each side panel to your back panel (right sides facing each other).
5. I wanted a collar on my vest and used the collar on my denim vest again as a guide (Note: I made my faux fur vest collar about 4 inches longer and made the ends squared off then pointed).
6. After you’ve cut out your collar, pin in to the top of your back panel. Looking good so far.

HOW-TO CONT’D:
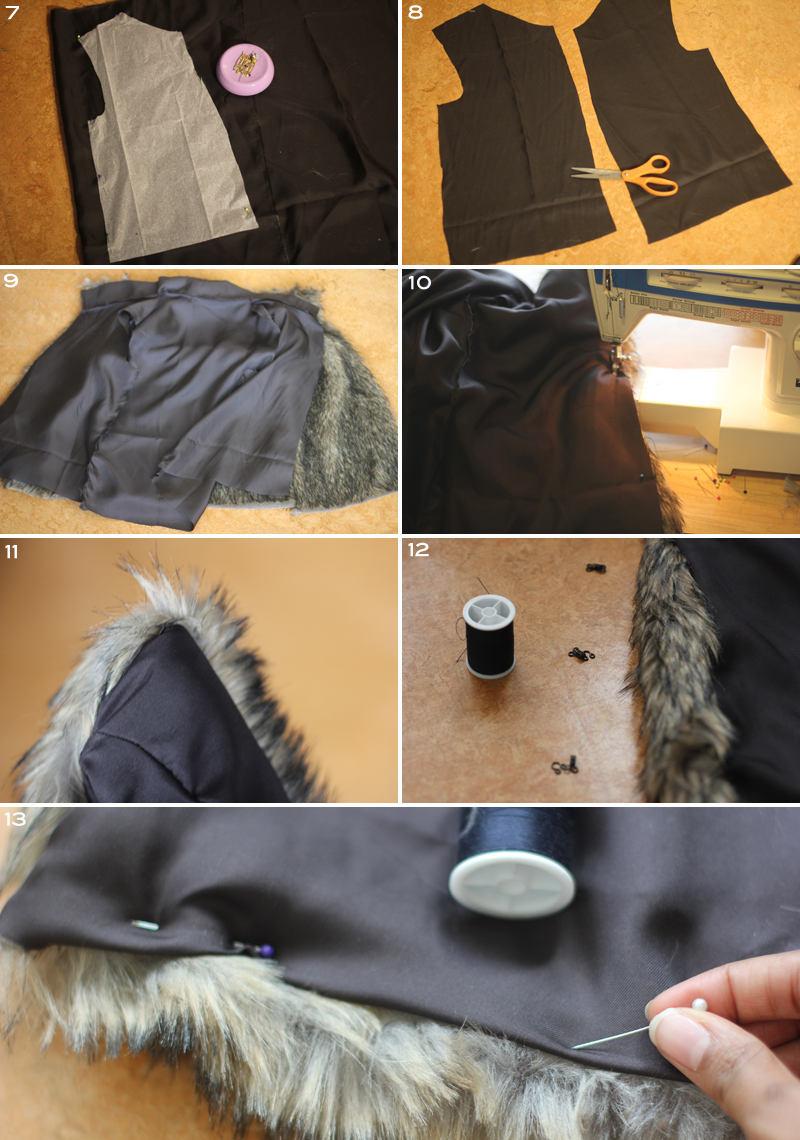
7. The under side of the faux fur was unfinished, kinda like carpeting.  So I opted to add a lining to mine. Therefore I used the patterns I created for the fur vest, to create another one with the lining.
8. Here I’ve started to cut out the front panels. Sew them all together the same way.
9. Now take your finished lining and fur vest and place them together (right sides facing each other), and use your straight pins to pin them together with a 1/4 inch seam allowance across the collar and down both sides of the front (Note: Leave the bottom hem open as well as the arm holes for now).
10. Now sew the two sides and collar that you just pinned.
11. You’re getting close, now flip the vest on the right side.
12. Take three hook and eyes and hand stitch them to the front of your vest.
13. Lastly pin the bottom hem as well as the arm holes, before you hand stitch them together, and you are all done!