Category: DIY

DIY

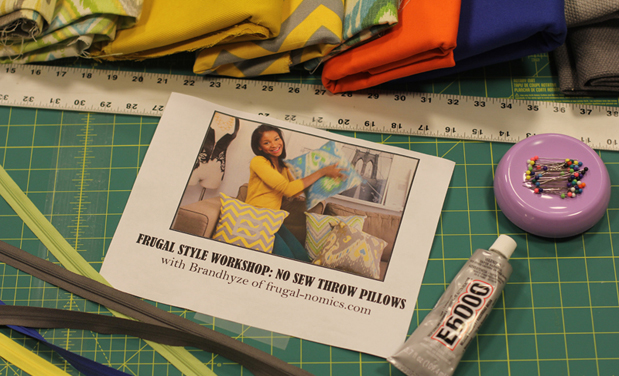
Schermerhorn Throw Pillow Workshop


Now I’ve made throw pillows on my own (see them here), but I gotta admit that DIY’s are twice as fun with fellow lovers!  So I was truly excited when I got invited back to do a workshop with the folks over at the Schermerhorn (see my previous tassel bracelet and tshirt necklace workshops here and here.).  Ikat, bold colors, and camouflage….you name it, we tried….and what a beautiful job they did!  I think the pillows turned out awesome, and if these smiles are any indication….I think they enjoyed the workshop just as much as I did. Have any ideas for future projects? Let me know below.

DIY

Frugal-nomics DIY: Gold Coins Necklace

A while back I came across a necklace called Loose Change made by Anthropologie — I was immediately taken by the piece’s simple construction and high potential for versatility. While their coins were textured, they were plain and I wanted my coin pendants to have a little more character. So, when I  came across these gold coins at Mood I knew I’d found just the foundation I needed to complete it. A few supplies, and a little suede cord and I was well on my way. Tell me what you think below.

SUPPLIES: some gold wire, a pair of scissors, (2) 1/4 in findings, pliers (2 pairs, help), wire cutters, 15 gold coin pendants, suede cord,
a few cocktail straws, packet of tiny findings, can a spray paint, and some newspaper for easy cleanup.

HOW-TO:
1. Ok, first you’ll take both sets of pliers and open up the tiny findings that will attach each of the 15 coins.
2. With your wire cutters, snip your cocktail straws into 1/2 inch pieces — I cut about 17.
3. Cut 2 pieces wire — one slightly longer than the other (about 1.5 inches).
4. Now attach the findings to the coins, and then close them back with your pliers.
5. I cut another long piece of wire and slipped all my pieces of straw onto it, and then sprayed them with gold spray paint.
(Note: I suggest letting them dry overnight).
6. Take your 2, 1/4 in findings and slip knot your 2 pieces of suede cord through them both.
7. Alternate gold coins and straw pieces on your 2 pieces of wire — 7 coins on shorter wire, and 8 on the longer.
8. With your needle nose pliers, bend the ends of the wire onto the findings.

DIY

Frugal-nomics DIY: Russian Fur Hat with Ear Flaps

There’s been a whole lotta snow here in the city this winter, and everywhere I look, people –both young and old —  have been donning these
Russian Fur Hats with the Ear Flaps (think they’re called Ushankas) to keep warm — me included. So, I thought it would fun to create my own. I
used some beautiful fuchsia colored wool knitted fabric, that really popped against the faux fur I found. Want in on the action? Take a look at the
steps below. Oh, and if you want another fun idea for fur fabric, check out my fur vest here.

SUPPLIES: 1/2 yard faux fur, 1/2 yard wool knit, scissors, 8 in of elastic cord, 4 small buttons, needle and thread, pattern (I made some
adjustments to one I found here at Sewbon.com), 1/2 yard silk lining, some straight pins, and a sewing machine.

HOW-TO:

1. Cut out your pattern (Note: I tweaked the Ear Flap portion to be a little rounder around the ear, and the Front Flap was a little
more boxy than I would have liked, so I used one of the side panels for the Front instead).
2. I wanted the Tiny Ears up in the middle of the hat, so I made my own pattern for those by bending the corner of the new
Ear Flap I made, to create these.
3. Pin the pieces to your fabric and fur and begin cutting out all your desired pieces.
4. Here are the pieces you’ll have when done: Fur = 1 front, 2 small ears, 1 ear flap; Pink Fabric = 1 front, 2 tiny ears, 2 sides,
1 top, and 1 ear flaps; Silk = 2 sides and 1 front.
5. Start with your Front Flap, Tiny Ears, and Ear Flap — pin them all right sides facing with their respective fur and fabric pieces.
6. Go ahead and sew your Front Flap together.
7. Here I’m sewing together my Ear Flap (Note: I found it easier to secure each ear first and then worry about the middle —
cutting out any excess if needed — or as the fabric stretches on your machine your ears may not line up the way you would like).
8. As you are sewing up the Tiny Ears, slip in the little loops of the elastic cord (Note: you may want to hand stitch them into place, mine
tended to wiggle around just a bit as I was trying to sew them on the machine).

HOW-TO CONT’D:
9. Now you’re going to take your Top Piece and pin it centered to the back side of your Front Flap.
10. Take your 2 Side Pieces and pin these 2 semi-circles to your Top Piece.
11. Sew these 4 pieces together.
12. Pin your 2 Tiny Ears into place on your 2 Side Pieces.
13. Ear Flaps up next — I found it easier to pin the center first, that way whatever was left would line up around the ears, evenly.
14. You should have already cut out 2 Sides and a Top Piece from your silk….go ahead and make a second little hat out of the silk for
your lining.
15. Place the lining inside of your hat, wrongs sides facing. Pin it into place.
16. I found it easier for this step to just hem the lining a 1/4 of an inch and hand stitch it to the rest of the hat.
17. Line up the elastic loops on your tiny ears where you’ll want your buttons to go, and then hand stitch them on (Note: I anchored them
with another button on the inside).