Tag: stella and dot

DIY

Frugal-nomics DIY: Stella and Dot Inspired Pegasus Necklace

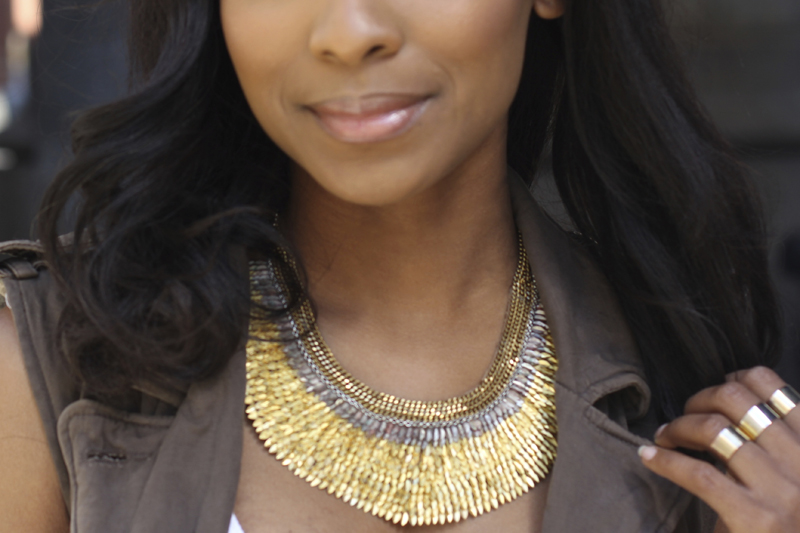
I’ve gotta admit that I’ve had a jewelry crush on the Stella and Dot Pegasus Necklace for a couple years now, and while I believe in investing in a few really nice statement necklaces, I couldn’t bring myself to cough up the over $200 price tag they were asking. So, me not minding to put the work in when it’s something I want, I took to finding suitable leaves to begin my jewelry quest to create a Stella and Dot Pegasus Knockoff. I was so very excited to complete it, and I’m happy to say that I get soooo many compliments on this when I wear it — and I do wear it quite often.  Gotta a necklace you’re crushing on? Tell me below. Of if you’ve been inspired by this one….please leave a comment too.


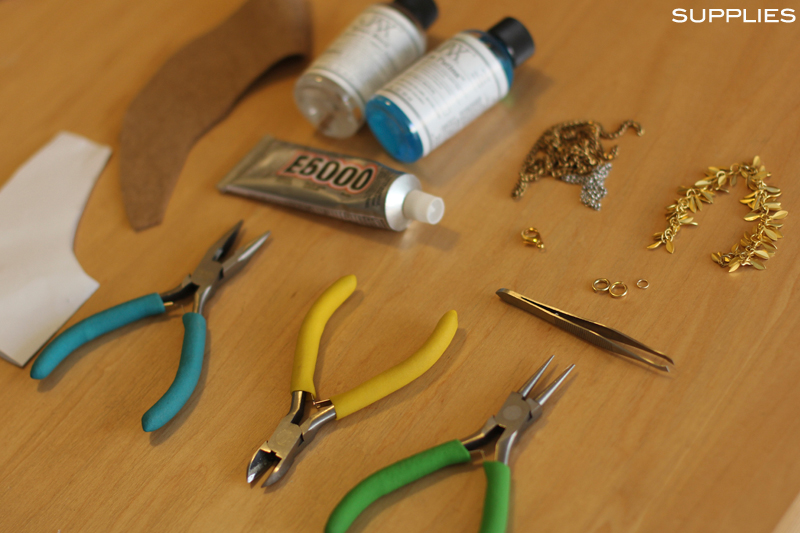
SUPPLIES: felt, patina, glue, assorted chain (I used 2 kinds), bulk folded leaf chain (I used about 6 feet — about 120 leaves come on each foot), 3 findings, a lobster clasp, tweezers, scissors, pliers, wire cutters, straight pins, a bowl, and paper to create the pattern for the shape of the necklace you desire.


HOW-TO:
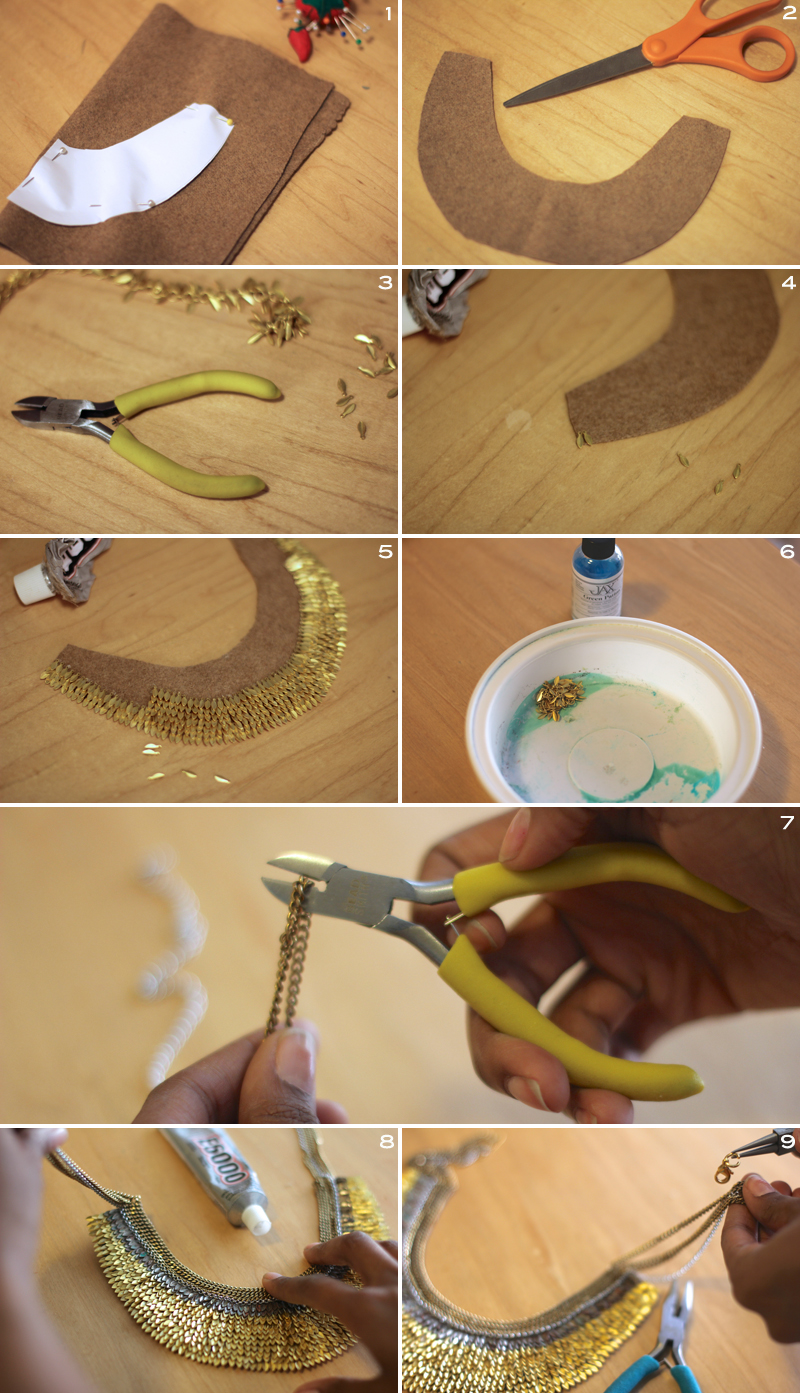
1.  Take a piece of paper and fold it in half, then cut out the shape of your desired necklace. After that…use your straight pins to attach your paper pattern to your folded in half felt.
2. Cut out this form.
3. The leaves will come on a chain, so take your wire cutters and remove them all from the chain.
4. Once all the leaves were removed from the chain, here I used my tweezers to lightly dip each leaf in the glue and then carefully adhere it to the wrong side of the felt.
5. I made long rows from left to right, being careful to visualize where my rows of leaves with patina and chain would begin.
6. Next I immersed about 155 leaves in a small bowl with green patina, and let it sit for a few hours. Once they reach my desired color of green, I rinsed them off, and then patted them dry before glued them to the felt.
7. Figure out how low you want your necklace to hang — mine is moderately close to my neck, then cut the 2 types of chain to your desired length.
8. Add a little glue to the exposed surface of felt, and press your chain into place.
9. Add a jump ring and clasp to one dangling side of your chain, and then pinch it closed. Repeat on opposite side with just a jump ring.
 

OUTFITS

Cargo Diem

Happy Friday guys!!!  So while it’s technically fall, we are squeezing out our last handful of warm days, and I couldn’t resist showing you a few pieces I’ve picked up and customized over these last few months.  I’ve been wanting a cargo vest since last year — that’s why I always say to invest in a few wardrobe pieces and you’ll get wear out of them year after year — so since I had a couple thrifted cargo jackets, I took one to my tailor and had the sleeves removed to achieve the look I wanted.  To top off the look, I also took to creating my own version of a necklace I’ve been drooling over — the Pegasus Necklace by Stella & Dot.  But, I didn’t want to fork over the $200 plus price tag….so…after a little digging, I found some leaf chain and took to my latest #diy.  Like the look….tell me what you think below. Have a beautiful weekend!

:: OUTFIT ::

Cargo Vest :: H&M (originally a thrifted jacket that I had turned into a vest)
Tank :: Faded Glory
Shorts :: Zara (2nd hand from eBay)
Necklace :: (My own creation)
Boots :: Steve Madden
Bag :: Kenneth Cole

DIY

Frugal-nomics DIY: Stella & Dot Tempest Inspired Necklace

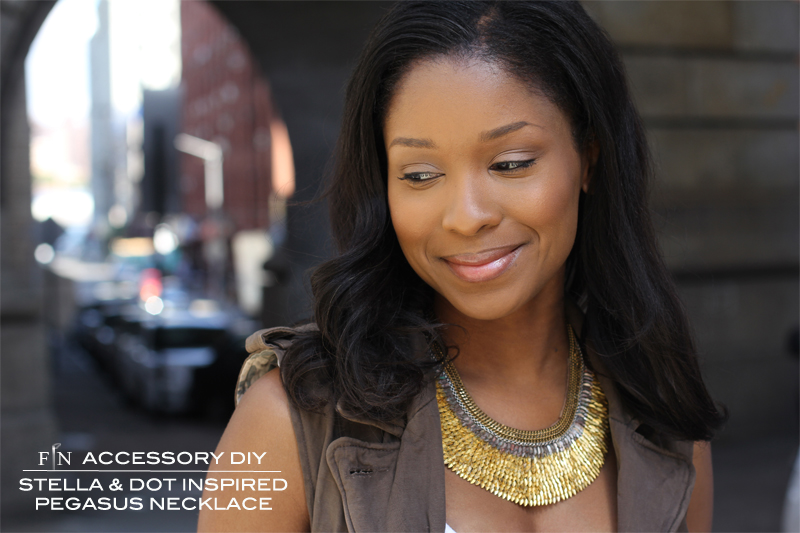
I’ve had a long time love affair with some of the creations from the jewelry line of Stella & Dot. But, sometimes our taste exceeds our budget.  Knowing a good statement necklace is often a staple in your wardrobe, I’ve opted to do it myself.  So, I grabbed some chain and embroidery floss and took to making my own version of Stella & Dot’s Tempest Necklace.  Like the Tempest, my necklace can be worn two ways — double the bang for your buck. Tell me what piece you’d like to see me recreate next, below. Have a great day!


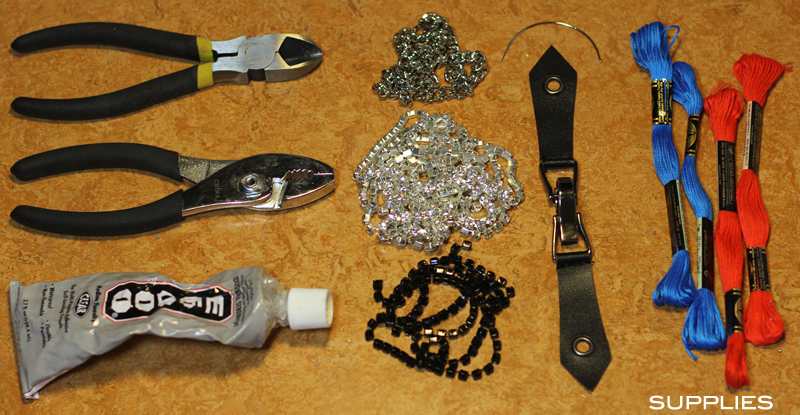
SUPPLIES: a pair of wire cutters, pliers, glue, chain, crystals (in black and clear), upholstery needle, closure, and embroidery floss.

HOW-TO:
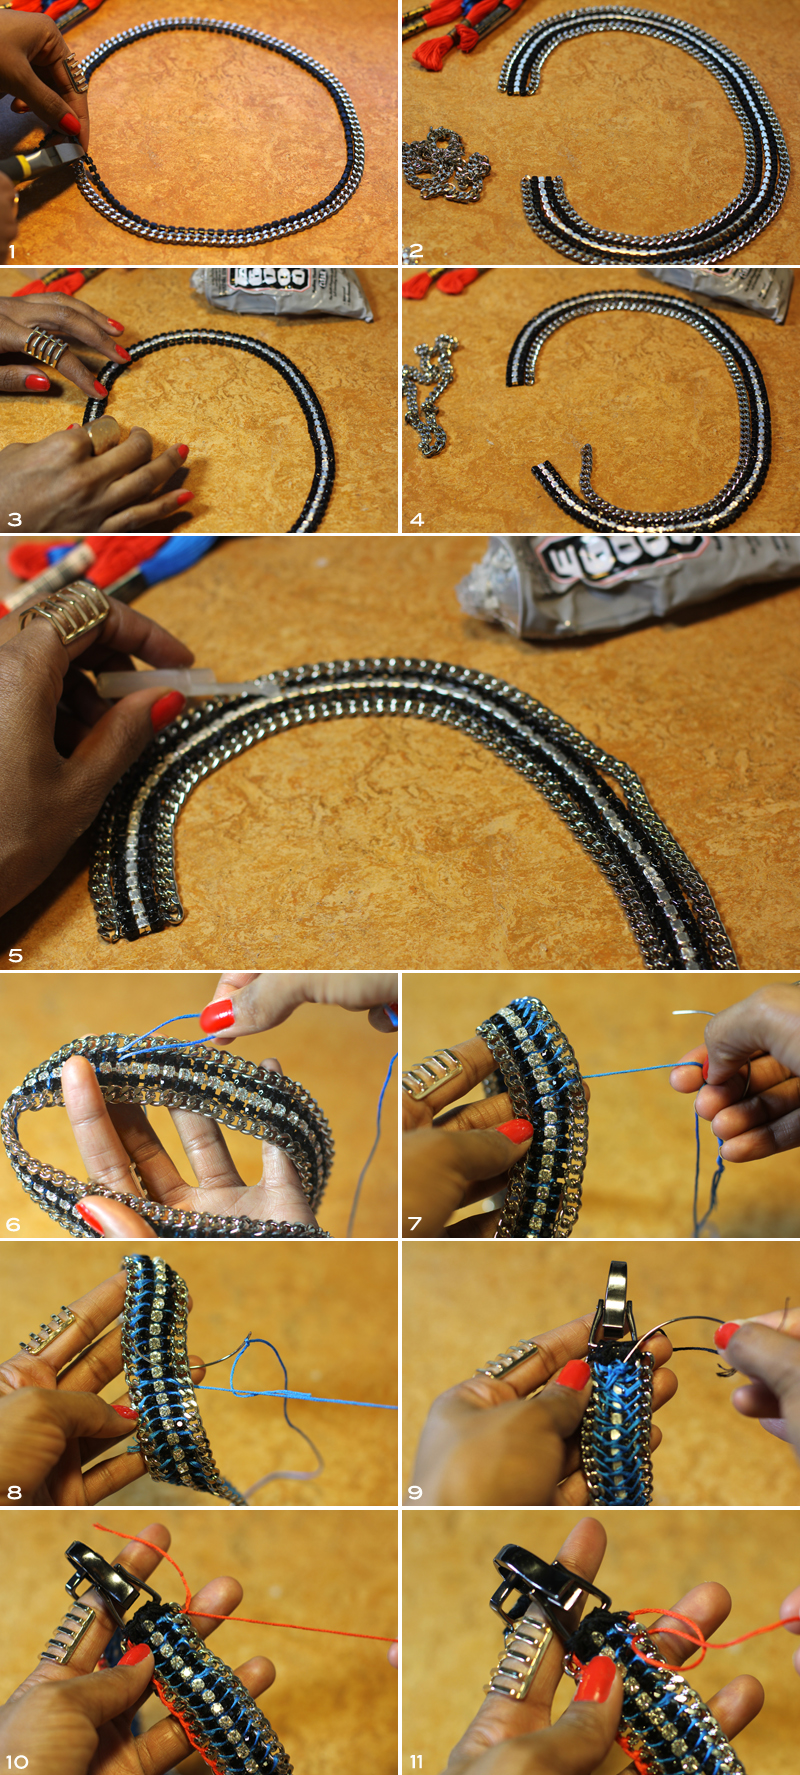
1. Using your wire cutters, cut down 3 pieces of crystals (I used to 2 black and one clear), along with 2 pieces of chain (Note: due to the nature of them curving, one will be gradually longer than the other from the inner edge to the outer edge).
2. You want to play around with the chain and crystals visually to figure out what you want.  Once you decide, lay everything out FACE DOWN in that formation exactly (Note: This step is extremely important, because once it is set, it’s set).
3. Now that you have an idea of what it’s going to look like, remove the 2 pieces of chain from the outer and inner perimeter, and begin to apply glue to the back side of just the crystals you will be working with (Note: you want glue not only on the back, but in between each chain a bit. You don’t want it to be too messy and show through the front of the necklace, but at the same time you do want them to adhere to each other). Let this sit for about an hour to dry.
4. Add back in the inner chain, and begin to add glue along the side of the chain and crystals.
5. Do the same thing for the outer chain, that you did for the inner. (Note: I used a pen cap to make the glue application in between chain and crystals, easier).
6. With my needle and thread, start binding just the 3 rows of crystals together.  You will ultimately tie the whole thing together, but start here.  I began on the back side and brought my needle up over top of the first row, drove needle beneath the middle row, and then went over the top of the last row — ending on the back side of the necklace.  From there, I fed my thread diagonally over to the top of the next row, and began again.
7. Next step is to bind the inner chain to the row of 3 crystals you tied altogether already. Knot the thread to the first link on the chain like I did in Step #10 — as always, starting on the back side.  Then drive needle from bottom over the top of the first row of black crystals, through the eye of the next adjoining chain link, back through the bottom. Repeat.
8. Repeat Step #7 for outer chain.
9. Grab one side of your clasp, you decide what will be top and which will be bottom.  I used black thread for a sleeker look. Starting with chain on one end, weave needle through each opening of crystals and chain, making sure to drive the needle over the bar of the clasp, with each pass. Then tie it on the back. (Note: the picture is a visual of how the under side of the necklace looks at this point).
10. With needle attached to thread, knot one end of a very long orange string (I’d say at least 3 feet) to the first link in the chain.
11.  Chain and crystals are all bound together at this point, so this threading is purely for decoration.  Take this same string and drive needle over the adjoining link to the right, and directly through its middle.  Right before you pull the thread taught, bring the needle back up directly between the necklace and the anchor thread (NOT BEHIND this thread –See picture).