Tag: look for less

DIY

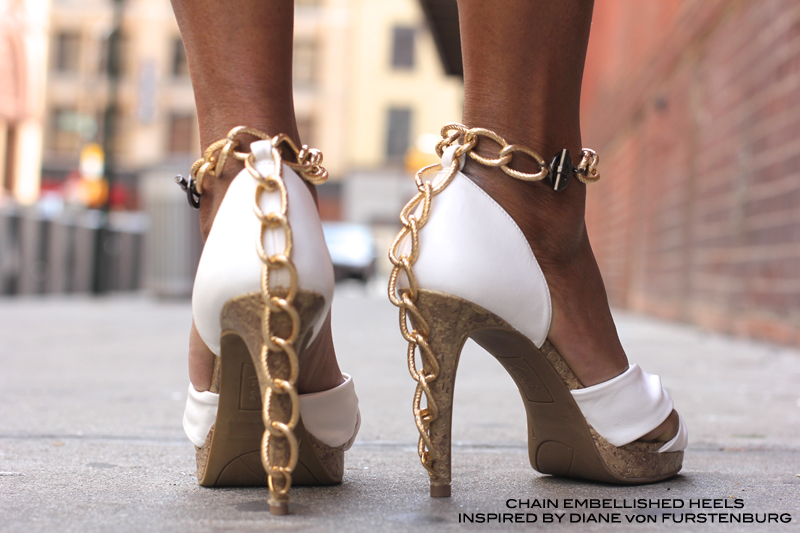
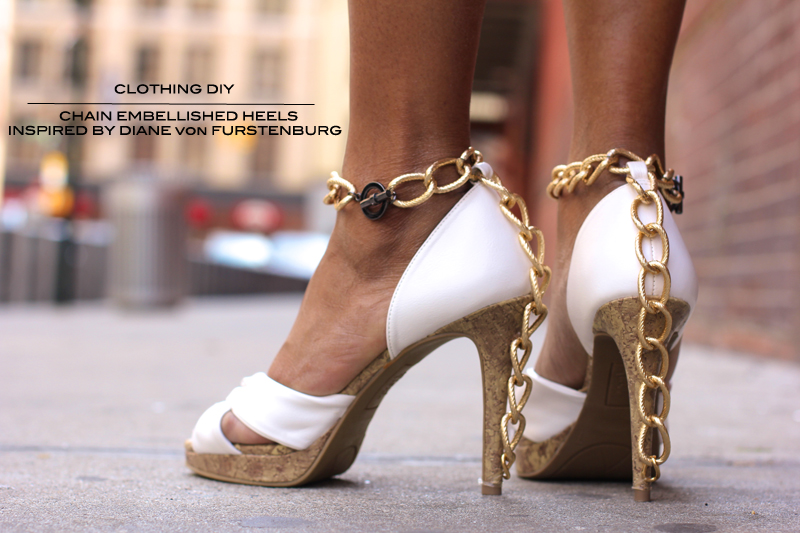
DIY: Chain Link Heels Inspired by DVF

So, I fell in love with these chain link heels from DVF from the moment I saw them.  So I grabbed some secondhand shoes (which I got for $5 instead of $10 because they were missing an ankle strap — which I knew I wouldn’t need, but welcomed the discount) metal chain, closures, and glue and immediately got to work. This takes my heels from drab to fab in no time. Tell me what you think!


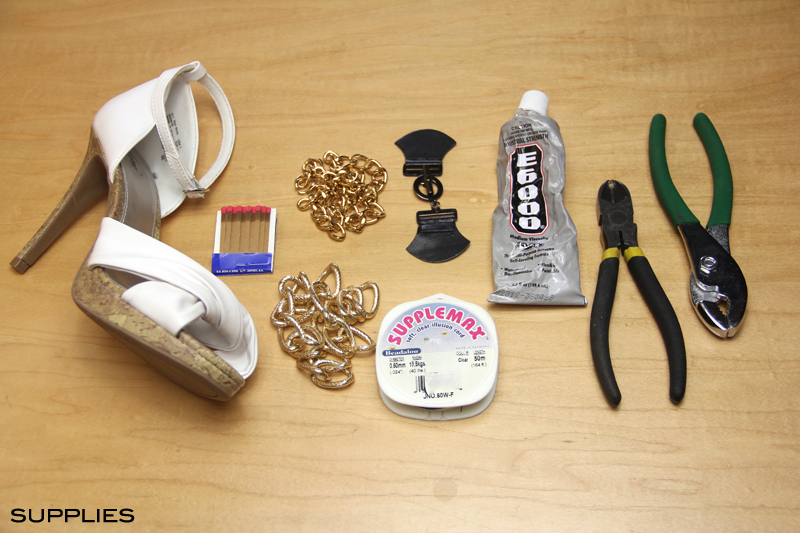
SUPPLIES: heels that once had an ankle strap, matches, large chain, smaller chain, 2 leather/metal closures, clear illusion cord, E6000 glue, wire cutters, and pliers.
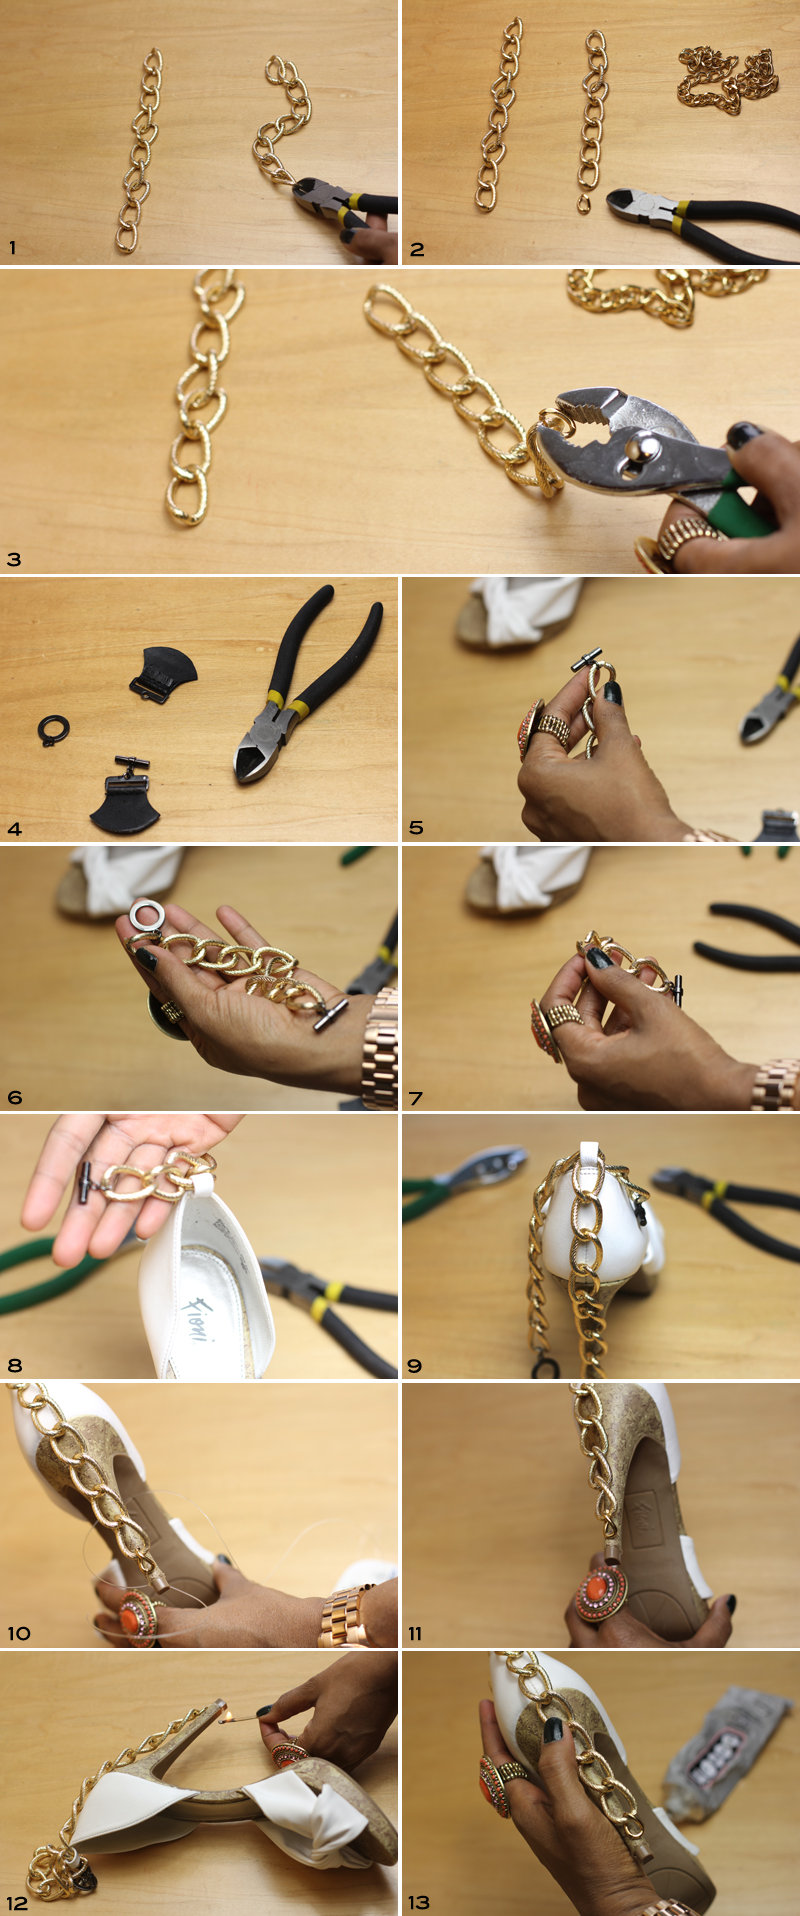


HOW-TO:
1. Go ahead and measure out how much chain you think you’ll need for your ankle strap (don’t forget to allow room for the metal toggle that will be attached. I used 10 large ones in total), and the chain that will go down the back of the heel (here I used 8) — use your wire cutters to pry the links open, and twist.
2. Remove one link from the smaller chains for the left and one for the right foot.
3. Add this one link to the base of each of the chains that trail down the back of the shoe.
4.Remove the 2 “toggle bars” and “loops” from the leather pieces. Be sure to keep the little rings attached that connect them to the leather, because you will use them in a second.
5. For the ankle strap (again, mine was 10 rings) attach the toggle bar by its ring to the chain (Note: If its for the right shoe, you will do the right side of the chain.  We’ll start with the right foot).
6. Now add the loop via it’s connector ring to the left side of that chain.
7. For the right shoe, you will count in 3 rings from the toggle bar, and then pry open that link.
8. Slide this 3rd link onto the loop on the back of your heel, and close it back.
9. Next take your chain that is 8 links long (the one with the small ring at the base), and attach it to the loop on your shoe as well.
10. Pulling the chain really taught while keeping it straight, slip the clear illusion cord through the small ring at the bottom of the chain that goes down back of shoe. Wrap this cord around heel a couple times right above the shoe tap, and double knot it on the inside of the heel.
11. Cut off excess cord right near the knot you created.
12. Use a match to ever so slightly melt the knot at the base of the heel tap (Note: be really careful doing this or the cord will snap).
13. In the middle of the heel, place just a dab of glue just beneath the chain to hold it in place (Note: you can also add a tiny bit to the chain itself to keep it turned in the direction the desired direction).  I also used a piece of string to tie it in place while the glue dried for about half hour.


DIY

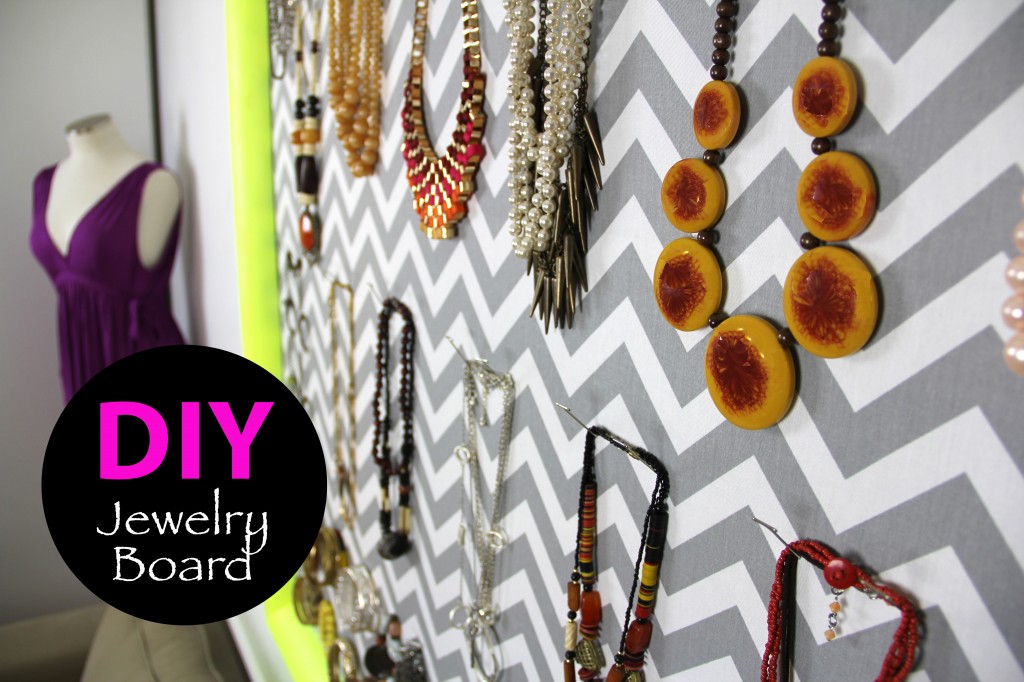
DIY: Jewelry Board

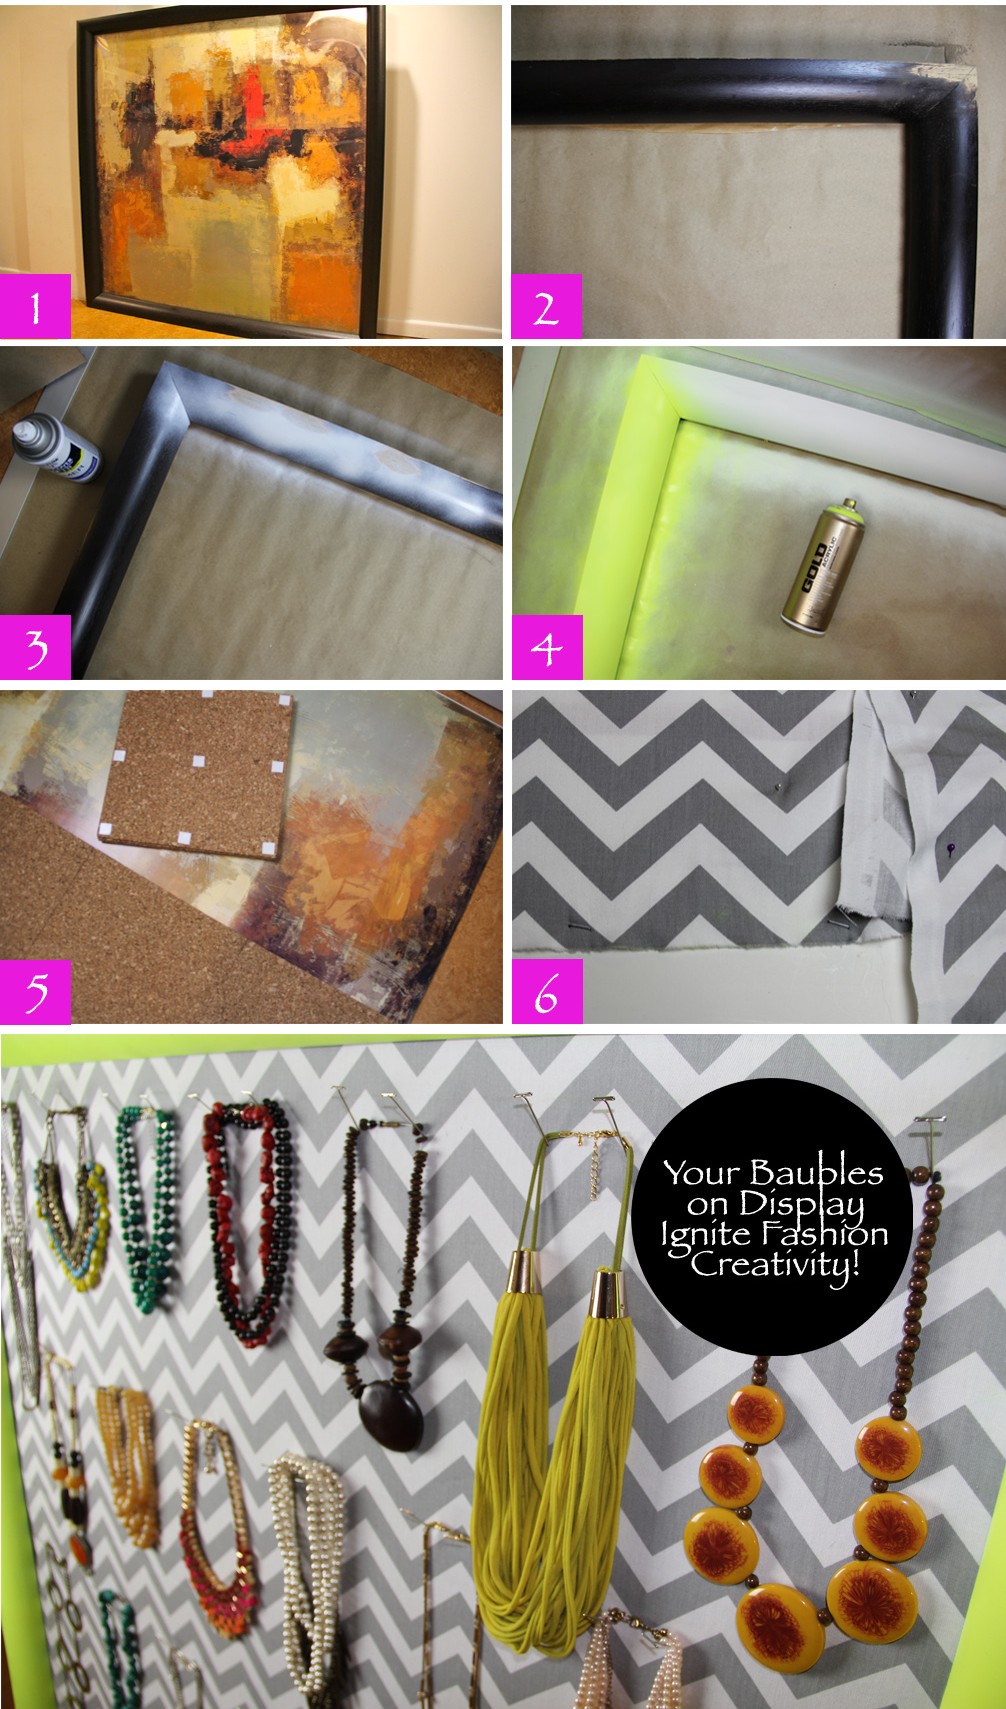
I’ve had a 4×4 foot abstract painting that I’ve had for several years now, but had long since outgrown the print.  Also running out of drawer space due to my thrift shopping addiction and wanting a better way to display my costume jewelry other than an unfrequented drawer, a need for some creativity on my part was sparked. And thus my nifty Chevron and Neon Yellow Jewelry Board was born.

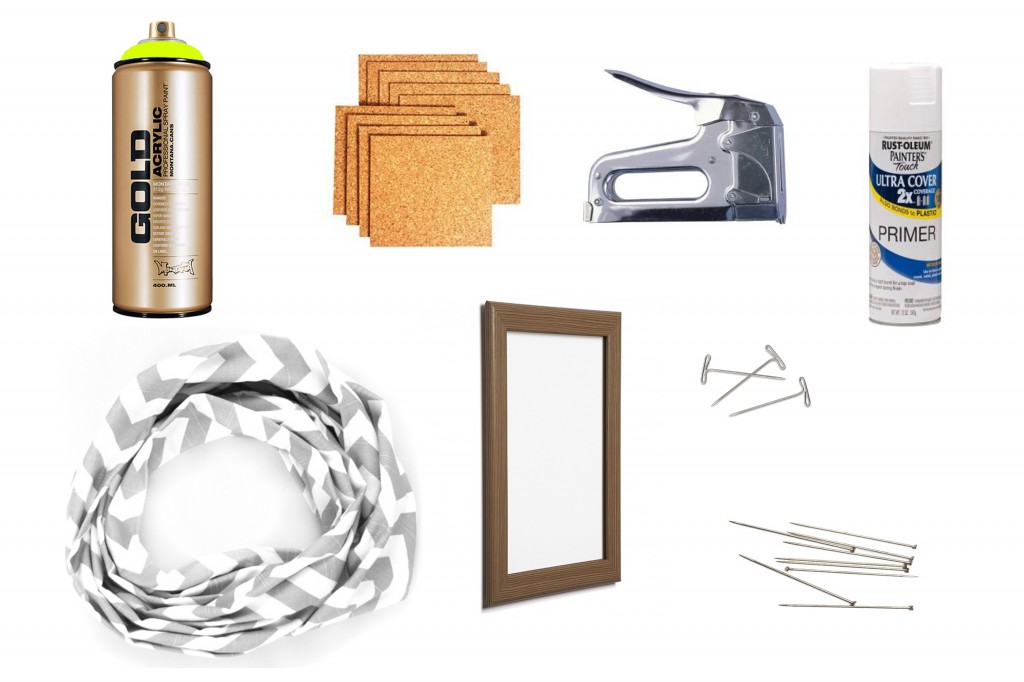
Supplies:

– Fabric
– Frame
– Spray Paint
– Primer
– Cork Tiles
– Straight Pins
– T Pins
– Industrial Stapler for larger frames

1. Frame Up – Pick a frame large enough to display your baubles, and make sure the fabric you use extends at least 2 inches on each side.
2. Single File – My frame had some had some deep scratches in it, so I used some sand paper to file them down.
3. Prime Time – Use your Primer to do long even strokes over each side of the frame until it’s an even white color.
4. Spray – Once your Primer is dry, repeat the same motion using your spray paint color of choice (this was my first time ever spraying painting anything….but I think I did pretty good).
5. Stick it Out – Take the backing of your frame and adhere your cork tiles to the surface with the sticky squares that come with it, cutting off any excess.
6. Keep it Tight – Tautly pull the fabric over your frame backing with the attached cork tiles, pinning the fabric in place (you can also use a regular stapler for extra support). You may need to use an industrial stapler for larger frames such as this one to staple the whole piece to the frame.
7. Show Time – Proudly display your jewelry using T Pins.

DIY

DIY: Recycled Tshirt Necklace

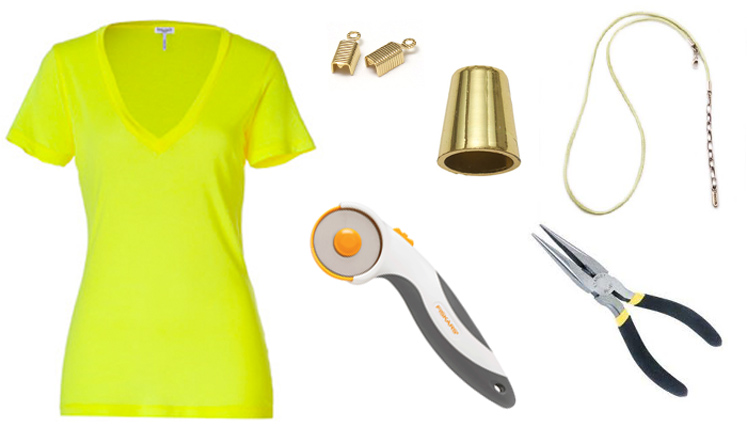
Tools You’ll Need:
– Old Tshirt
– Rotary Cutter
– Needle Nose Pliers
– Synthetic Leather Cord
– Large Cord Fasteners
– Small Cord Fasteners
– Clasp and Chain
– Straight edge
– Needle and thread

Take any old bold color tshirt (soft and slightly stretchy are best), you can stock up on them at thrift stores like Goodwill and the Salvation Army for like $1.

1. Cuttin’ Up – Cut the tshirt into 3/4 inch strips up to the underarms (you should get about 20 strips).  Note: be sure to use a mat or cardboard to protect your surface from the blade of the rotary cutter.

2. Stretch it Out – Grab each strip at the seams on either side, and pull.  Try to stretch each strip about the same width, so as not to have any really long ones that stick out from the bunch. Line the seams as you stack them up and it’ll make your job easier later.

3. Stack ’em Up – For added security, feed a needle through the stacked seams to give the necklace an overall polished look.  Wrap the string around the bundle several times, intermittently reinserting the needle through the stack.

4. Cut the Cord – Cut the synthetic leather cord to the desired length you want your necklace to hang, and fold it in half around the end of the necklace.

5. Positive Reinforcement – Pull the end of the necklace and synthetic cord through the larger cord fastener. Feel free to add glue or insert the screw for extra reinforcement.

6. Fasten and Clasp – Lastly add the smaller cord fasteners to each end, along with the chain and clasp. Now…rock your statement necklace with style!