Tag: skirt

OUTFITS

Winter Chic


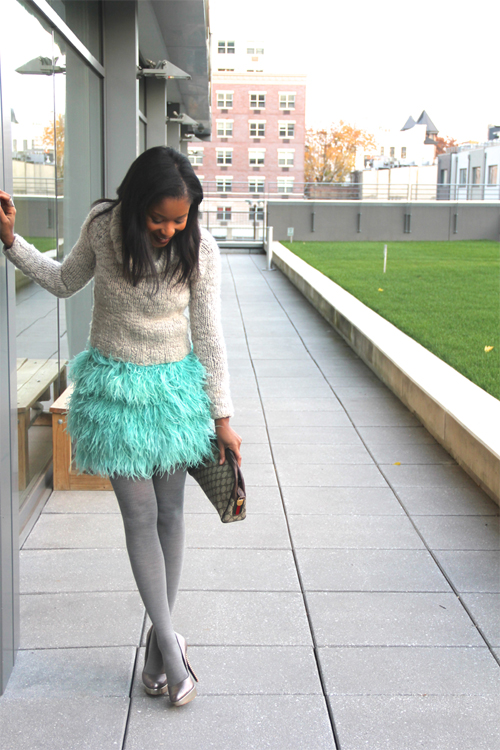
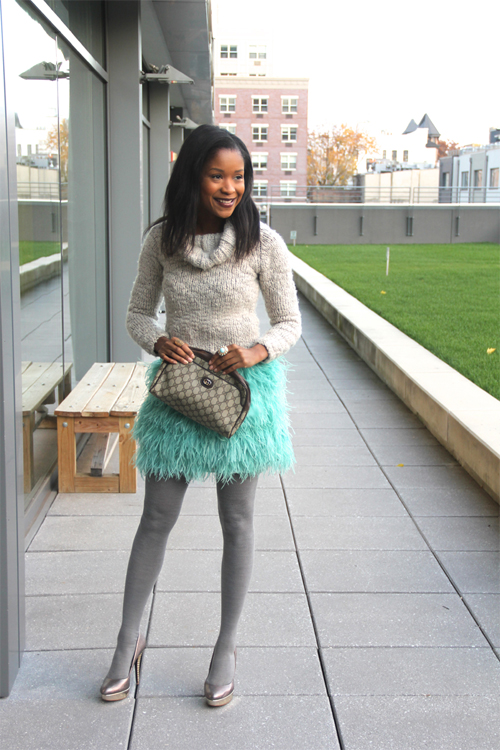
Happy Tuesday guys!!! A couple of weeks ago fellow blogger, Sam at Fabulous Petite, commented on my Ostrich Feather Skirt DIY that she liked it a lot, and I mentioned to her that I’ve been itching to wear it again. True enough, the temps have been dropping here in New York City, but that didn’t stop me from grabbing a chunky sweater and some tights and making one of my favorite DIY creations, winter chic. Tell me how you winterize your wardrobe and what you think of this one, below.

:: OUTFIT::

Mossimo Supply Co :: (Thrifted)
Skirt (my own creation, also seen here)
Tights :: Target
Shoes :: Rachel Roy
Handbag :: Gucci (Thrifted)
Rings :: Charming Charlie
DIY

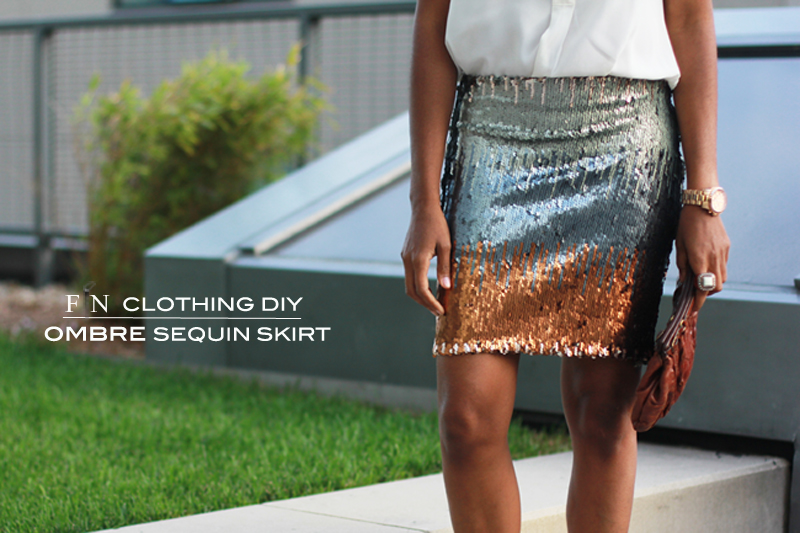
Frugal-nomics DIY: Ombre Sequin Skirt

I’ve been totally snatching up anything sparkly these last few months, and I immediately fell in love with this ombre-like sequin fabric when I found it recently.  I’ll admit, it takes a little work to finish the edges of things you make with sequins (like this Rihanna inspired top I made here), but they are certainly stand out pieces that will be memorable closet keepers. Tell me what you think below.


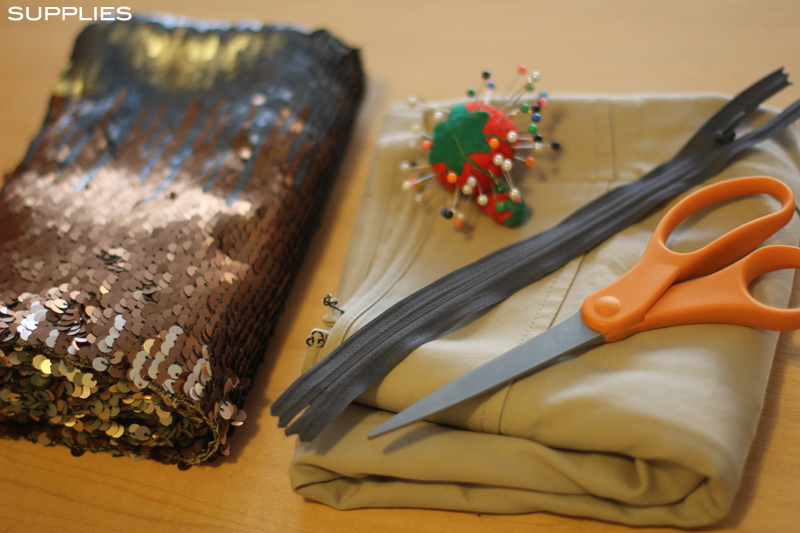
SUPPLIES: 1 yard of ombre sequin fabric, some straight pins, an invisible zipper, scissors, and a skirt you already own with a shape you like.

HOW-TO:
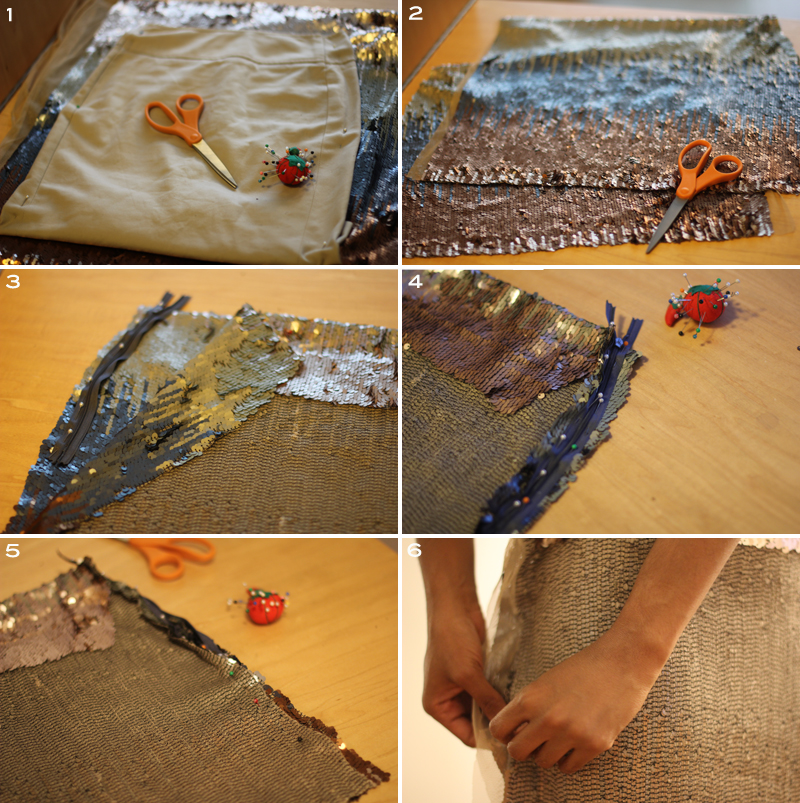
1. First up, fold your fabric in half and lay a skirt you love on top of it to create your own pattern.
2. Now, go ahead and cut out the 2 forms of the pattern you just created.
3. Place those 2 forms together — insides facing — and pick the side where you’d like to place your zipper.  Open up the two forms, and giving yourself a 1/2 inch seam allowance, pin the zipper on one side of the form, being sure to start close to the top of the waist band. (Note: I liked more of the rust color on the bottom, so I folded down quite a bit at the waist to center my desired design).
4.  Once one side of the zipper is in place, go ahead and flip the skirt over and pin the 2nd half, down.
5. Close up the remainder of the zippered side of the skirt with straight pins.
6. It was easier for me pin the correct shape with the skirt on, so I slipped it on to pin the opposite side. 

HOW-TO CONT’D
7. Open up that zipper and sew it into place on both sides.
8. Now that the zipper is intact, go ahead and sew together the remainder of this side of the skirt.
9. After feeling a little clumsy with the fabric scissors, I opted to snip off the remainder of a 1/4 inch seam allowance of sequins with cuticle scissors. This step takes a little while, but the clean edge it provides is well worth it.
10. Fold back 1/4 inch hem and pin it into place.
11. It’s a lot less messier if you put some paper down, so lay the skirt on top, and uncover only the area you want to spray with adhesive.  Let it dry.
12. Hand stitch 1/4 inch hem, remove pins, and then you are all set!


DIY

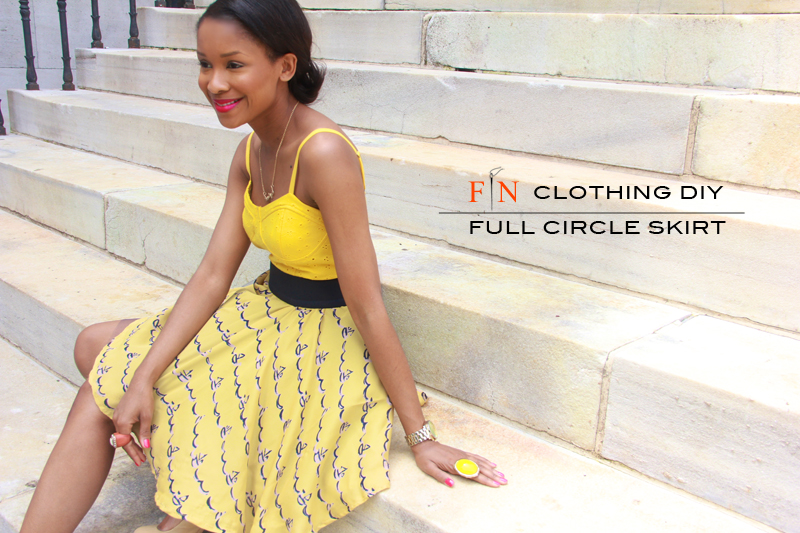
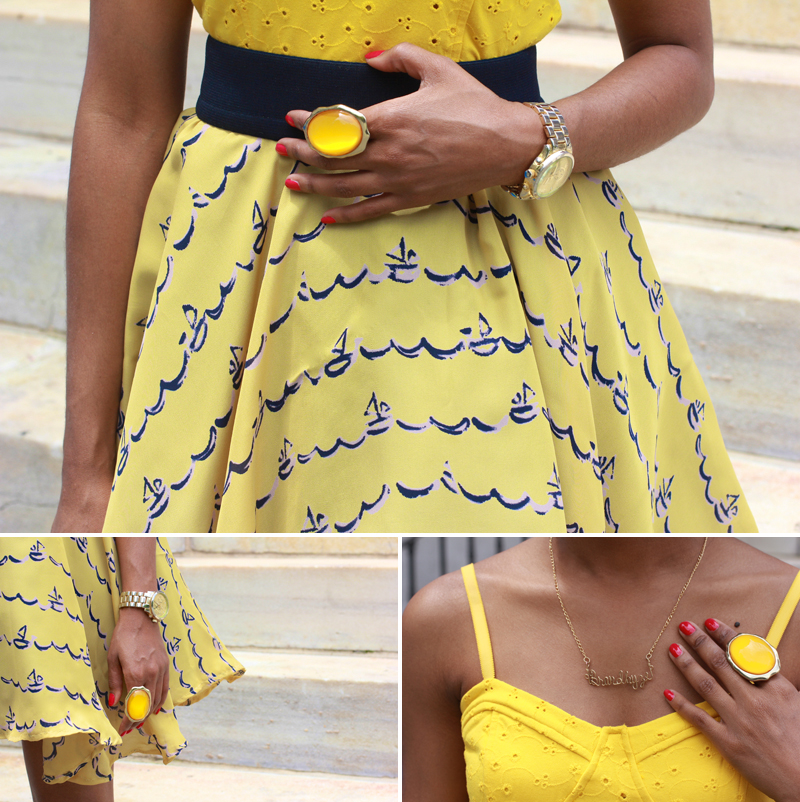
DIY: Full Circle Skirt

I was recently inspired by a Jean Paul Gaultier for Target dress that my girlfriend wore as a skirt (here’s a pic of another blogger, Rachel Thillen wearing it)–I mean, it was bold, it was sexy, and it was fun.  So, I just had to create my own. It was then that I came across this sailboat printed material, and instantly knew I’d found the perfect palette — matched it with some tulle for volume, and I was on my way.  Tell me what you think below!


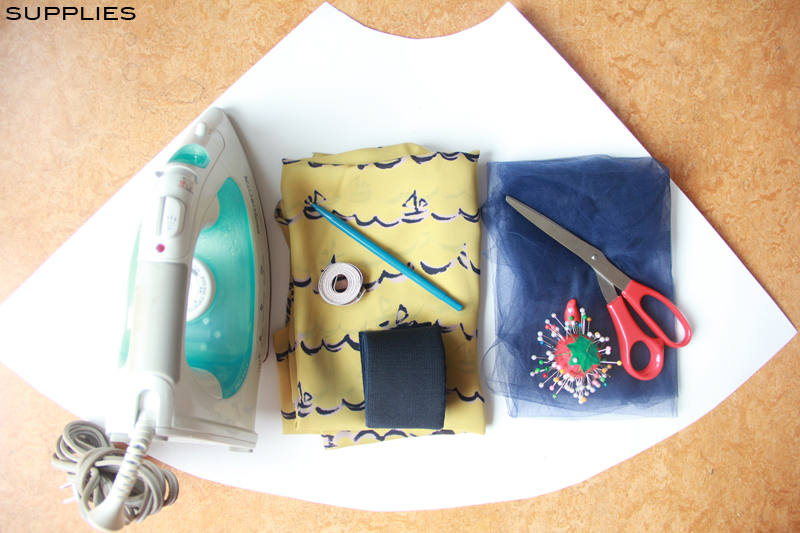
SUPPLIES: Iron, charmeuse  (about 2.5 yards), 2-inch elastic band (depends on length of waist; I used about 2.5 feet), tape measure, pen, tulle (about 3 yards) , straight pins, scissors, cardboard, and a sewing machine.


HOW-TO:
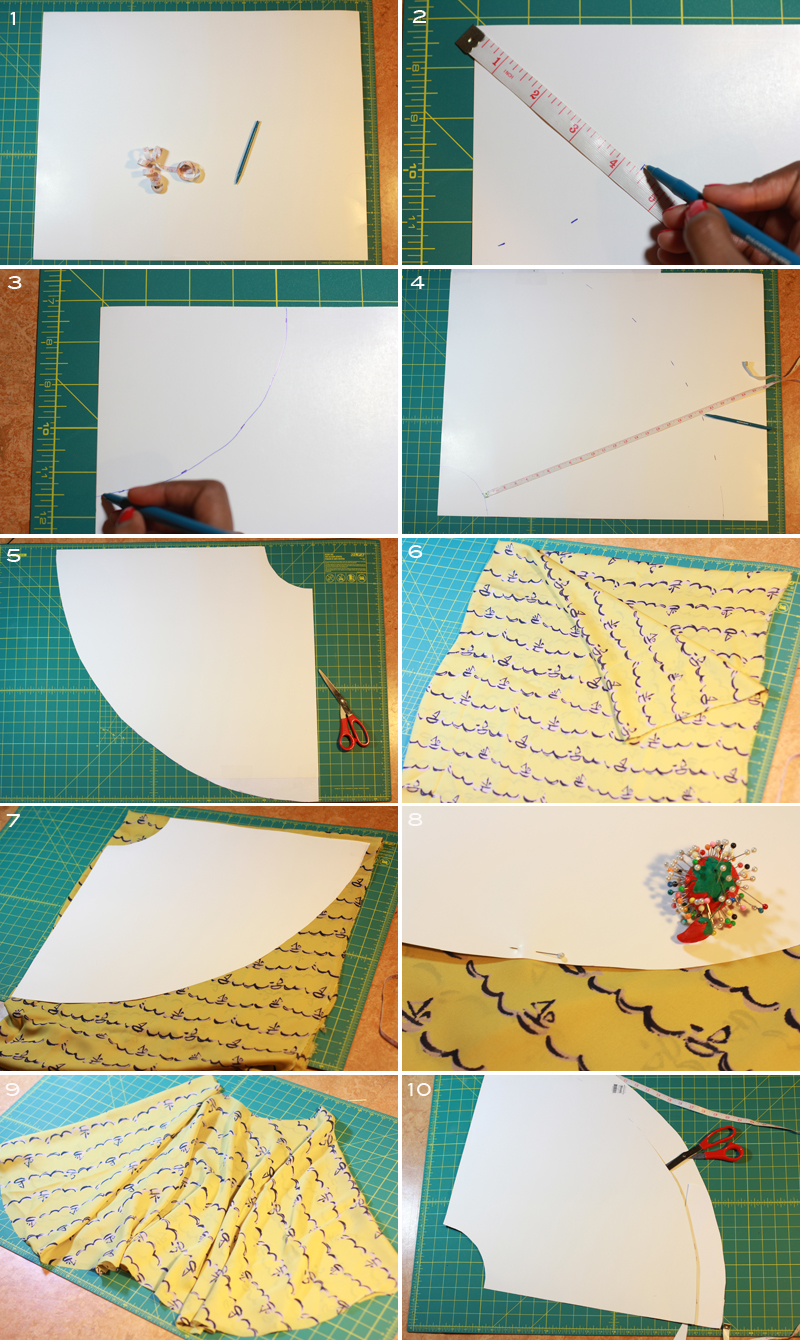
1. You;ll need to make a pattern; so take your tape measure, pen, and card board to create your own for your skirt.
2. Next, go ahead and decide the length of your waist by using this equation (don’t worry…it’s really easy): (waist length + 2 inches)/(6.28).  Note: For example, my equation was (25 + 2)/6.28 = 4.299.  Then starting at the corner of your cardboard, take that number (mine was about 4 1/3 inches) and measure it out from one edge, to the other.
3. Connect your dots.
4. Decide the length of your skirt (Mine was about 18 inches). Make sure you are cognizant of the width of your fabric, or you may wind up having to do what I did and tape some extra paper onto your cardboard to complete your pattern.  Measure the 18 inch (or whatever length you decide) line like you did in Step #2, from the line you previously created.
5. Cut out your cardboard triangle.
6. Fold your fabric in half, and then in half again.
7. Place your cardboard pattern on top of your fabric (Note: in my picture, the fold is across the top, and down the left hand side).
8. Since the charmeuse is such a slippery fabric, it may help you to pin the cardboard pattern to the folded fabric.
9. Cut out the form — this is what it looks like when you are finished.
10. Now that you’ve cut your skirt out, you don’t need that original pattern, so you can now use the cardboard cut out to create the pattern for the tulle skirt.  (Note: in my picture I cut off about 2 inches, but wound up only needing one. So, my tulle skirt pattern was 17 inches).


HOW-TO CONT’D:
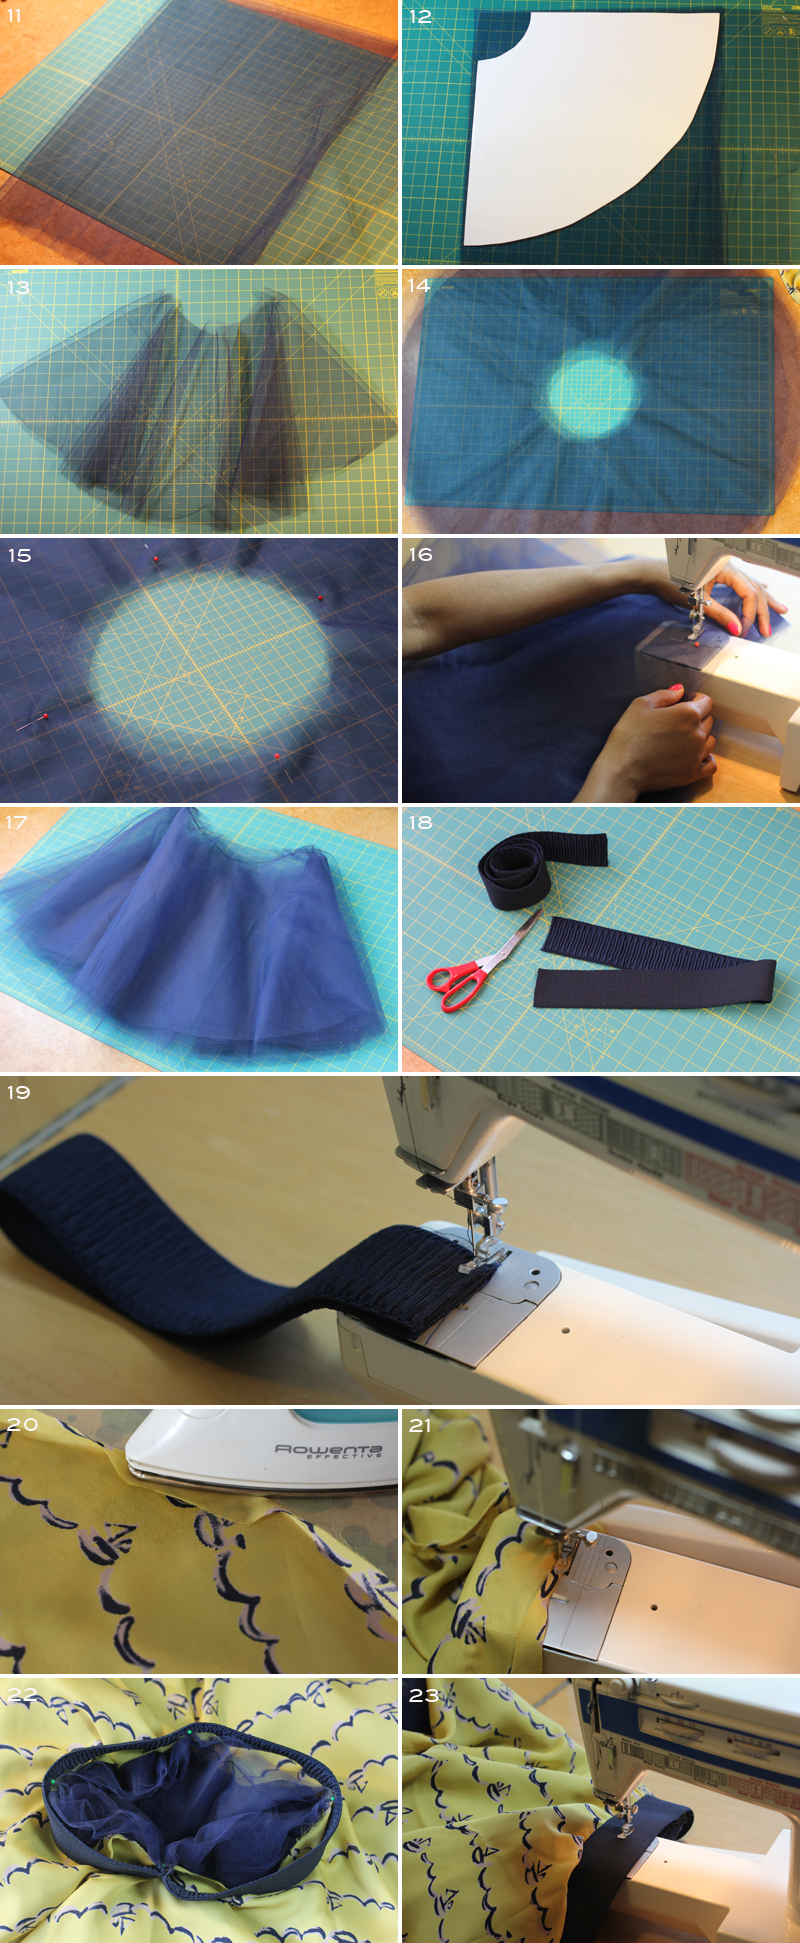
11. Fold your tulle in half, and then half again, like you did in Step #6.
12. Remember, the folds in the picture are down the left side, and across the top. Cut out the form (Remember, this time it’s 17 inches in length).
13. It will look like this once you’ve cut it out….I individually cut out 6 of them.
14. Lay all 6 forms out on top of each other, being careful to line up the middle circle as best as you can.
15. Using straight pins to secure the form at its north, south, east, and west points.
16. Lay your 6 tulle forms on the sewing machine, and sew one continuous stitch around the top of the waist.
17. It will look like this once you are done sewing.
18. Cut out a piece of elastic the length of your waist plus 2.5 inches (so you can get it over your hips).
19. I want the flat side exposed, so turn the elastic right sides together, and stitch it.
20. Iron a 1/4 seam allowance all the way around.
21. Go ahead and sew the hem.
22. Now, take the waist of your skirt, and your elastic band (right sides out) and secure the skirt to the inside of the elastic. I pinned it initially in 4 spots — the north, south, east, and west points.  After pinning these four points, I then added more pins all the way around the waist band.
23. Sew the band to the skirt….and you’re all set!

While shooting this post, I seemed to have attracted a little fan in the park who also liked my skirt. Her name was Alexis, and the following day was her birthday, so I thought it only befitting to include her 🙂