Blog

Blog

DIY

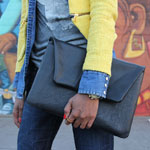
DIY: Leather Envelope Laptop Case


SUPPLIES: Leather, Fleece, Fabric Glue, Velcro, Heavy Duty Thread, Regular Thread, Upholstery Needle, Tape Measure, Needle, Rotary Cutter, Straight Pins, Wash Cloth, Scissors, Iron, and a Sewing Machine.


HOW-TO:
1. You are going to create two rectangles.  For the first, pin a piece of leather and felt together, right sides facing each other. My Macbook Pro laptop is 13 in x 9 in (length x height), so I want to make this first rectangle 14 in x 17.5 in (Note: I added an inch to the length for the seam allowance, and then added 8.5 in to the height to account for the flap).
2. Cut it out.
3. Take the first rectangle which is 14 in x 17.5 in, and make a chalk mark 10.5 in from the bottom for the fold line.
4. Make a second mark one inch above the fold line (So it’s 11.5 in from the bottom).
5. To create my top flap, I made a chalk mark in the top center (For me, directly at 7 in).
6. I want the point of my flap to be 9 in in total, so I made a chalk mark 4.5 in on either side of the center line I created.
7. From the 11.5 in mark you made along the side, draw a diagonal up to the 4.5 in marks you made on the left and right side of the center mark.
8. Sew just around the edge of the top flap and about a half inch down the straight away of the sides.
9. Here’s what Step 8 looks like; now remove pins.
10. Turn this flap to the correct side.
11. Measure the desired length of the velcro, add glue, and adhere it to the inner flap.(Note: I add glue to hold it in place, and then later hand stitch it for added security, or sew it on with the machine with the regular thread).
12. Now you grab two more pieces of leather and felt, rights sides facing each other to create a second rectangle –this one will be 14 in x 10.5 in and will serve as the front of your laptop case.
13. Take this second rectangle and sew along the diagonal on one side as pictured (Note: Right sides are still facing together).
14. Step 13 will look like this.
15. Turn this second rectangle on the right side.
16. Take a damp wash cloth and lay it on both pieces to iron out any bulges.
17. Take the second rectangle and pin it to the front of the first rectangle (well…now, it’s more of a trapezoid); right sides together. Be sure to pin it 1/4 in below 11.5 in mark you made (So that’s in between fold line and this second line).
18. Sew the whole thing together on both sides and the bottom.
19. So you are certain you place bottom piece of velcro in just the right place; insert your laptop, stick bottom velcro onto top velcro every so lightly, apply glue, and press it into place. Let dry for a few minutes before removing laptop. Feel free to stitch it for added security.


:: Outfit ::
Jacket :: Zara
Tshirt :: No label (Thrifted)
Denim Chambray :: Uniqlo (Thrifted)
Jeans :: Banana Republic (Thrifted)
Envelope Laptop Case :: My creation
Rings :: Aldo
Shoes :: Steve Madden


OUTFITS

Hot Pink and Leopard


Hey guys….Happy Wednesday.  Hope you all are doing well despite the frigid temps.  I’m pretty sure you all have seen this necklace — one of my latest DIY’s. I’ve been playing around with the idea of it’s versatility and challenging myself to dress it both up and down.  I decided to pair it with one of my favorite second hand blazers. Any go to piece you want to dress up/down?

Well, I hope you all enjoy the rest of your day — thanks for checking out this post. Oh, and please be sure to vote for me in Cotton’s Road to the Runway Contest. It takes 2 seconds. Please vote often and share — every vote helps! Thanks.  Talk soon!

:: Outfit ::
Blazer :: Free People (Thrifted)
Jeans :: Denim Rules by TRF
Tank :: Faded Glory
Clutch :: Lulu Townsend
Necklace :: My own creation (also seen here)
Ring :: Aldo

DIY

DIY: Studded Denim Jacket with Leather Sleeves

Happy mid-week everyone. I’m really excited about this latest DIY — one night while watching an episode of DON’T TRUST THE B— IN APT. 23 I fell in love with a studded collar black denim jacket Krysten Ritter was wearing. Totally inspired, I took to my closet to scrounge up this thrifted Armani Jeans jacket that I hadn’t even worn; however, I wanted to take it a step further.  Yes I’d do studs (galore), but I’d also take this amazing perforated leather that I found…and give my jacket the ultimate touch of “cool.”


SUPPLIES
Heavy Duty Thread, Seam Ripper, Denim Needles, Straight Pins, Denim Jacket (I got this one for .75 cents), Thimble, Tweezers, Scissors, Studs (I opted to mix my metals and use both silver and gold), Leather, and a Sewing Machine


HOW-TO

1.Take each lapel followed by the collar of the jacket and insert each nailhead with a thimble in your desired pattern. Remember to separate the layers with your fingers, so as to not have prongs from nailheads protrude to the underside.  (Note: I recommend laying them out to begin with to get a visual sense of how many you will need spatially in each row).
2. Cut the denim sleeves from the jacket (Note: Take my advice and measure twice, cut once). You should leave yourself about an inch allowance. Measure it on both the front and back.
3. After you’ve removed the sleeves, take one sleeve along with a seam ripper and take apart the two pieces (I didn’t bother to remove the cuff). This way you can use the two “halves” as a pattern for the two leather sleeves you are now creating.


4. Double up two large portions of the leather. Lay out the two pieces of the sleeve you just took apart, and use the straight pins to secure them to the two pieces of leather.
5. Cut out these 4 forms, giving yourself a couple extra inches for allowance at what will become the shoulders, and then remove the straight pins.


6. Now that you have two pieces from each layer of leather, take the first layer and begin pinning the sleeves together inside out at the seams, just like the denim sleeve you just removed.
7. Now pin the second seam of the sleeve to close it up.
8. Sew both seams on each sleeve.
9. Turn the completed sleeves on the correct side.
10. Make sure the jacket is inside out, and slip the sleeve into the arm hole on the correct side (Note: You’ll know you did it correctly when both finished sides of the sleeve and jacket are touching).
11. I didn’t take my own advice and measure twice before removing denim sleeves.  But if you left yourself that inch, you should be able to pin the leather sleeve to the jacket and recreate the same seam as before.
12. Sew the leather arm onto the jacket (Note: Start and finish sewing at the under arm — this way any excess can be concealed here if necessary).